How to burn an Audio CD with Windows Media Player 12
Note: The instructions below are intended as information on converting songs you have legally purchased from digital format to an audio CD for your personal use. Distribution of copyrighted material without the copyright holder's permission is illegal whether you receive any sort of compensation or not.
- Click Start » All Programs » Windows Media Player.
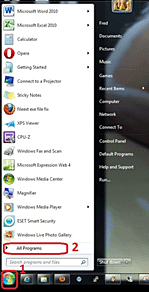
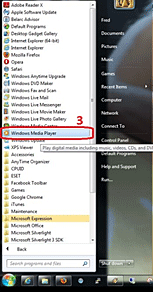
- Windows Media Player will open.
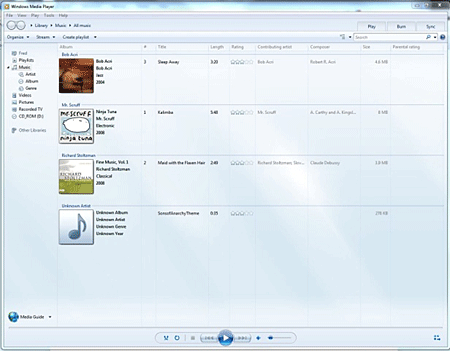
- Click Library or Go to Library.
- Click the Burn Tab.

- Click Burn Options and then Audio CD.
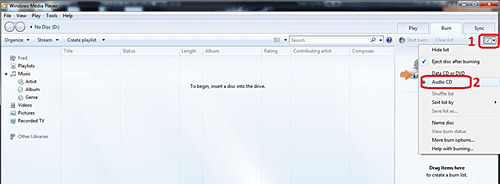
- Insert a blank CD into the optical drive. If the Autoplay options box opens, close it.
- Find the songs you want to burn either in the Library or in a removable media like an external hard drive.
- Drag the songs to the center of the List pane.
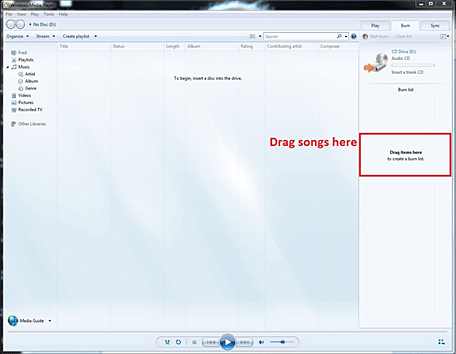
- As songs are added you will see the list of songs added and the time remaining on the disc. If you wish to change the order of any of the songs, simply drag them into the order you want.
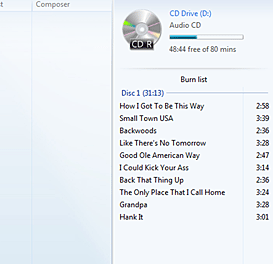
- If there are any that you wish to remove, right-click on the song and left-click remove from list. This will not remove the song from your library or external media.
- Once you have all the songs added and in the order you wish, click Start burn.
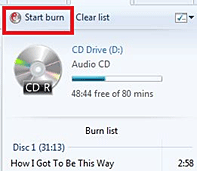
- The songs will be written to your CD.
- It will make one pass through the list Preparing.
- The second pass through the list it will show Burning to disc and a progress bar for tracks that it is writing. Complete will be shown for tracks that have been written. Pending will be shown for tracks not yet written.
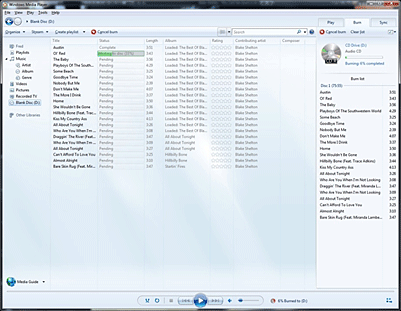
- When Windows Media Player has finished writing all the tracks, the disc will eject.
Technical Support Community
Free technical support is available for your desktops, laptops, printers, software usage and more, via our new community forum, where our tech support staff, or the Micro Center Community will be happy to answer your questions online.
Forums
Ask questions and get answers from our technical support team or our community.
PC Builds
Help in Choosing Parts
Troubleshooting

