How to install Software for an HP OfficeJet 4500 on Mac OS X
Description: This article assumes that the printer and computer are on the same network or are connected by a USB cable. There are two install options. The first is with the provided installation software on the CD. The second is with the automatic downloaded software.
Mac OS X is able to install a basic printer driver for many printers. This will allow a printer to function but will not enable the scanner or the fax functions. For the full function of the All in One Office Jet 4500 to work, please install the software from the CD.
Using the HP install disk
- Put the disk into the CD drive, wait and then double click on the CD icon on the desktop.

- In the Finder Window double click on the HP installer program..
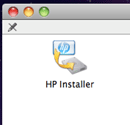
- Click on Continue in the lower right.
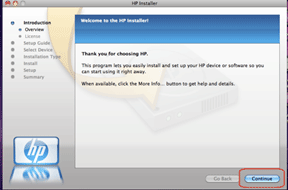
- Click on Continue after reading the license terms.
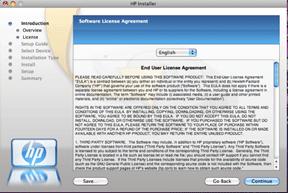
- A pop up box will ask to agree or disagree.

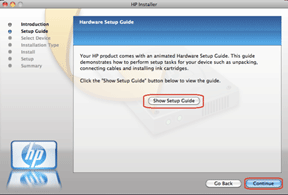
- For help with the unpacking of the printer, the next screen will walk through the process. Click on Show Setup Guide or if help is not needed click on Continue.
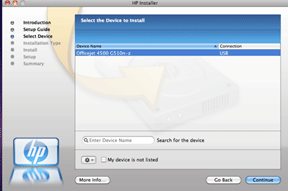
- Next, choose the printer to install from the list of printers shown. Click on Continue.
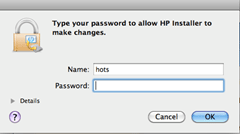
- Type in the password used at the Mac OS X login.
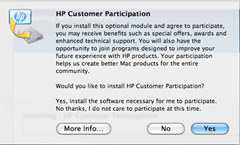
- Select to participate in the HP Customer Participation or not.
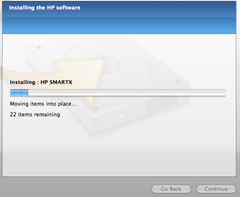
- The files needed will now copy to the Mac.
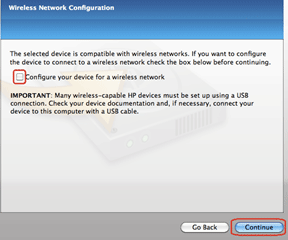
- If this printer will be used wirelessly, check the box and then click Continue.
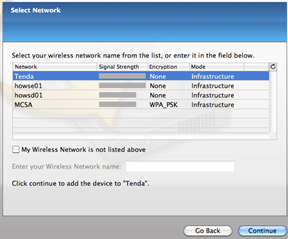
- Select the wireless network to connect to by clicking on the name of the correct network. Then click Continue.
- Enter a password for the network.
- A screen showing the connection information for your network will come up with the IP address of the printer. If no IP address is shown, there was a problem connecting to the printer. Use the HP user guide to troubleshoot.
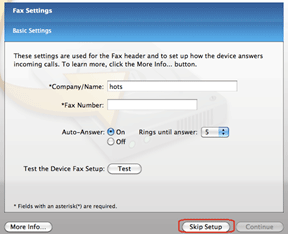
- If a fax will be setup proceed with the following settings, otherwise click on Skip Setup.
- Next click on Print and Fax button to setup the printer on the system.
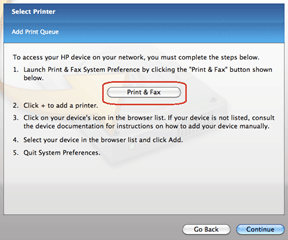
- Follow the instructions to add a printer to the system.
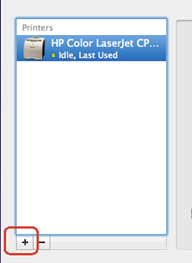
- Click on the + to add a printer.
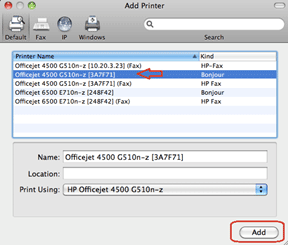
- Click on the name of the printer - in this case Officejet 4500, then click Add.
- The printer will now appear in the list. Right click the printer and choose - set as default from the menu. Then close this box with the red button on the top left.
- Click continue - then finish on the HP setup wizard.
- The printer is now installed.
Using an automatic install
- Plug in the printer to the USB port on the computer.
- A Window will come up presenting the available printers.
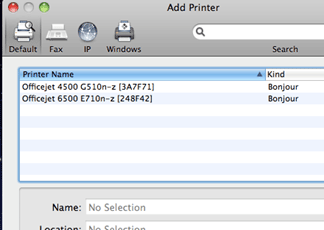
- Click on the name of the printer and then click on Add in the lower right.
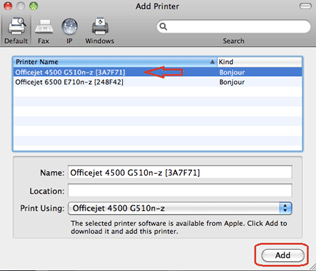
- A window will ask if this printer will be added. Click on the Install button to install basic printer software.
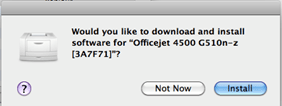
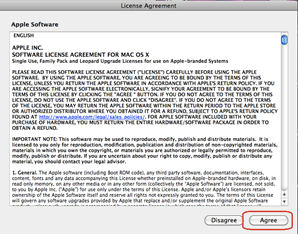
- Agree to the license terms after reading them.
- The software will begin to install - this is a printer driver only. The scanner and fax will not function with this driver.

- The printer will now appear in the installed printers section.
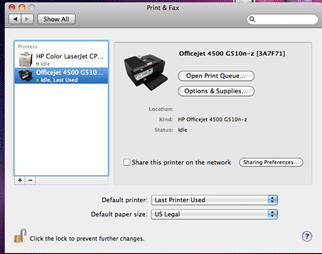
- The printer is now installed.
Technical Support Community
Free technical support is available for your desktops, laptops, printers, software usage and more, via our new community forum, where our tech support staff, or the Micro Center Community will be happy to answer your questions online.
Forums
Ask questions and get answers from our technical support team or our community.
PC Builds
Help in Choosing Parts
Troubleshooting

