

How to change the Amount of Virtual Memory in Windows 7
Description: Virtual Memory is space on your hard drive that the system can use as an extension of your memory if it is full. This can help systems that have lower amounts of physical memory to run more efficiently. Virtual memory is slower than physical memory but can help performance.
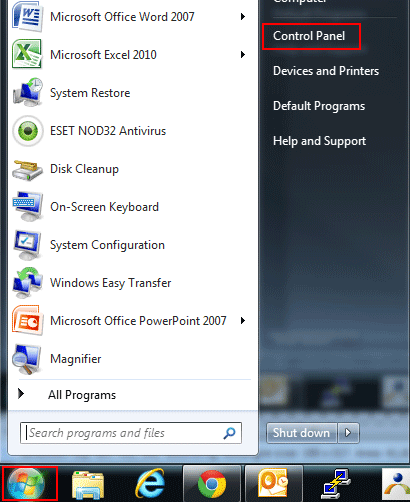
- Click Start and select Control Panel.
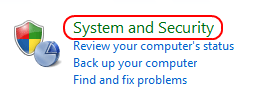
- When the control panel opens click System and Security..
- On the next screen click on System..

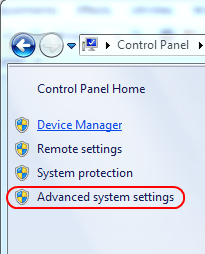
- On the panel to the left click Advanced System Settings..
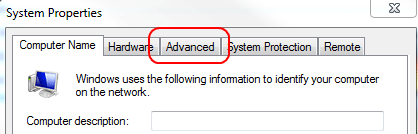
- From the tabs along the top select Advanced.
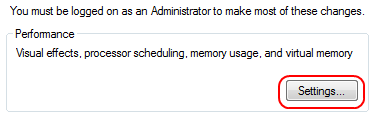
- Then select Settings under performance.
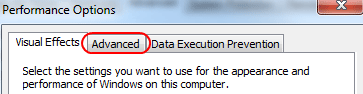
- In the window that comes up select Advanced again.
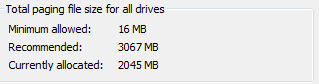
- The computer will display how much virtual memory it currently has.
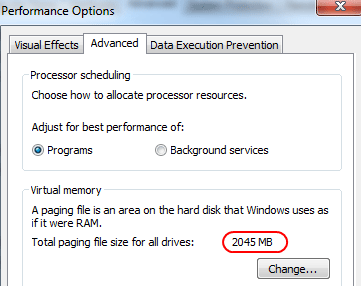
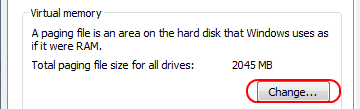
- If you want to increase this amount you can do so by clicking Change..
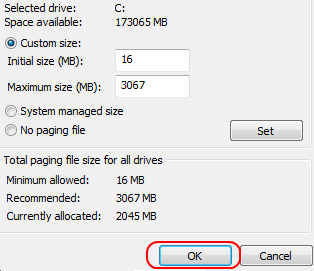
- The bottom of the screen will display the current settings and what Windows recommends.
- If you would like to change this amount deselect the checkbox by Automatically manage paging file size and select custom size.
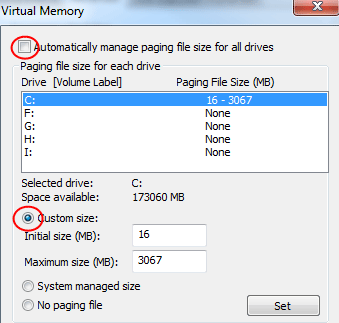
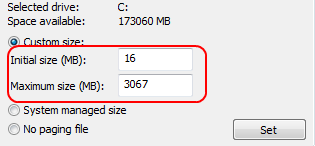
- You can then input the amount you would like into the initial and maximum size boxes.
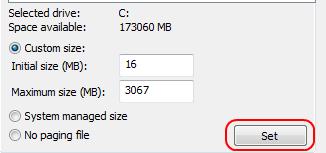
- Once you have changed the size to the desired amount click Set.
- Then click Ok.
- Then close any windows that are still open and restart the computer, This reboot may take longer than normal as it makes the changes.
- The changes are now in effect.
Technical Support Community
Free technical support is available for your desktops, laptops, printers, software usage and more, via our new community forum, where our tech support staff, or the Micro Center Community will be happy to answer your questions online.
Forums
Ask questions and get answers from our technical support team or our community.
PC Builds
Help in Choosing Parts
Troubleshooting