How to change the Computer Name in Windows 7
Description: This is a how-to article for Windows 7 on the subject of changing the Computer Name. This could be useful if there is more than one computer with the same Name on a network.
- Click on the Start button in the bottom left, then right-click on Computer and select Properties.

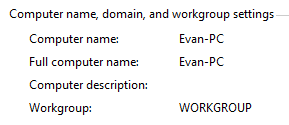
- On the new System window, look under the Computer Name, Domain and Workgroup Settings section for the Computer Name.

- Click on Change Settings to the right and allow or grant access if prompted.

- On the new window, click on Change.

- Enter the new computer name in to the Computer Name: field .

- Click OK to proceed.
- If prompted to restart the computer, save and close all open work, then restart the computer.

Technical Support Community
Free technical support is available for your desktops, laptops, printers, software usage and more, via our new community forum, where our tech support staff, or the Micro Center Community will be happy to answer your questions online.
Forums
Ask questions and get answers from our technical support team or our community.
PC Builds
Help in Choosing Parts
Troubleshooting

