How to enable the Firewall in Mac OS X
Description: Just like Windows, network security is important on a Mac computer as well. These steps will describe how to enable the firewall and protect against network threats.
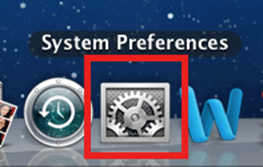
- Begin by clicking the System Preferences icon along the dock.
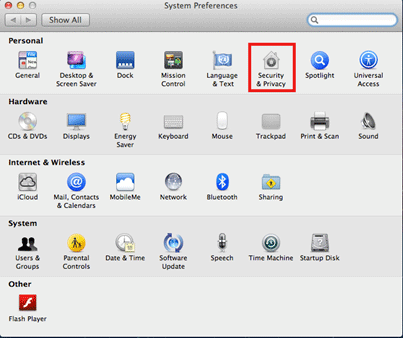
- Once in System Preferences, choose the Security and Privacy icon.
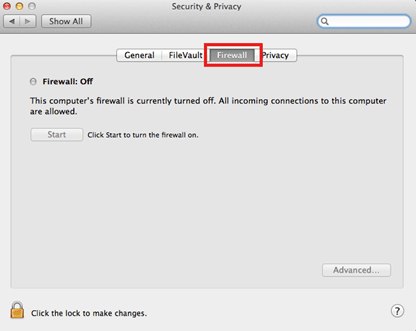
- From here, click the Firewall tab along the top row.
- Click the Lock icon in the bottom left corner to make changes to current settings.
- To enable the firewall, click the Start button. This will enable the firewall with the basic settings.
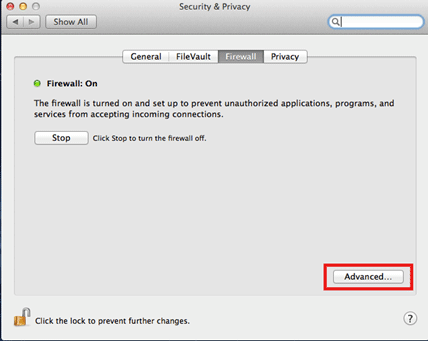
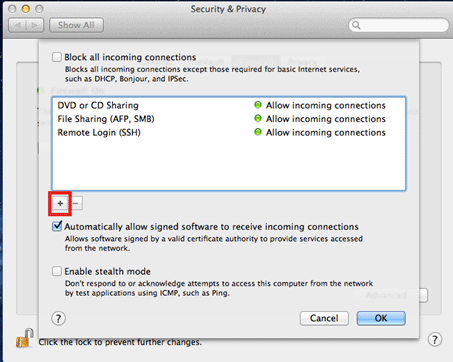
- To add personalized, individual settings, click the Advanced button.
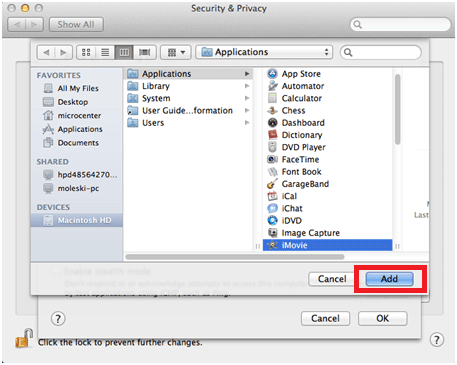
- To add individual settings for programs, hardware, files, etc, click the + icon. This will display the Finder menu.
- Select an application, and then click Add.
- Repeat this process as necessary to add additional programs.
- Once completed, click OK to close the current window. When the window closes, click the Lock in the bottom left corner to prevent any further changes.


Technical Support Community
Free technical support is available for your desktops, laptops, printers, software usage and more, via our new community forum, where our tech support staff, or the Micro Center Community will be happy to answer your questions online.
Forums
Ask questions and get answers from our technical support team or our community.
PC Builds
Help in Choosing Parts
Troubleshooting

