How to remove Write Protection from an External Device in Windows 7
Description: This technical article shows how to remove Write Protection from an external device in Windows 7. Sometimes external storage devices will be write-protected, preventing the user from adding new files or folders. To remove write protection on a Windows 7 Computer, follow these steps:
- Open the Start menu.

- In the space that says Search Programs and Files type the word command.

- At the top of the list it should say Command Prompt.

- Right-click there and select Run as Administrator.

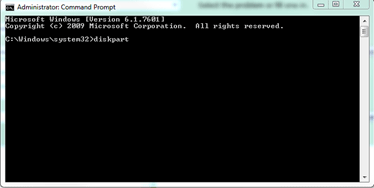
- In the window that opens, type diskpart and press the Enter key.

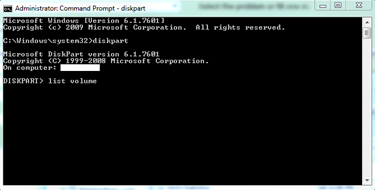
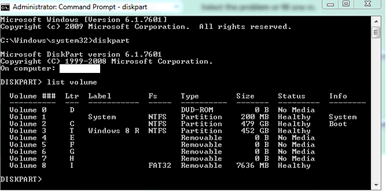
- In the next line that opens up, type list volume and press the Enter key.

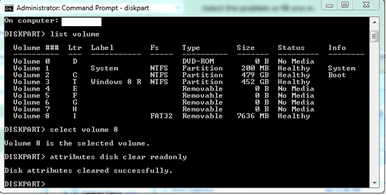
- In the list provided, type select volume # where the # is the number of your desired device. In this case it is 8.

- Type attributes disk clear readonly and press Enter.

- Type exit and press Enter. The disk should no longer be write-protected. If it is then there is a hardware issue with it that will need to be addressed with a technician in person.
Technical Support Community
Free technical support is available for your desktops, laptops, printers, software usage and more, via our new community forum, where our tech support staff, or the Micro Center Community will be happy to answer your questions online.
Forums
Ask questions and get answers from our technical support team or our community.
PC Builds
Help in Choosing Parts
Troubleshooting

