
How to run a Check Disk in Windows 10
Description: This article will show you how to queue check disk to run after the next restart. The Check Disk utility scans through your entire hard drive to find and fix problems. It can help prevent bigger problems and loss of data.
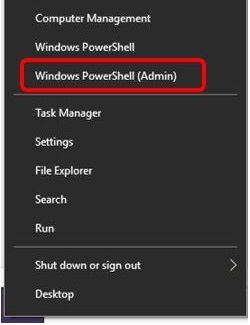
- Right click on the Start icon on the lower left, and then choose Windows PowerShell (Admin)
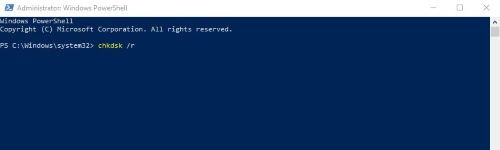
- Type the following command: chkdsk /r and then press Enter on the keyboard to execute the command.
- Restart your computer. Check disk will run and if necessary, repair the disk during startup. If a repair process is necessary this can take an hour or more depending on the circumstances – allow the process to finish completely.
Technical Support Community
Free technical support is available for your desktops, laptops, printers, software usage and more, via our new community forum, where our tech support staff, or the Micro Center Community will be happy to answer your questions online.
Forums
Ask questions and get answers from our technical support team or our community.
PC Builds
Help in Choosing Parts
Troubleshooting