
How to share Files over a Network in Windows 10
Description: This article will show you how to share files over a local network in Windows 10.
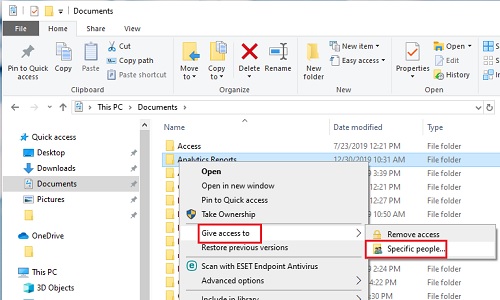
- Open Windows File Explorer from the taskbar.

- Locate the folder or folders or individual file that you want to share and right click to open the drop down menu.
- Hover your cursor first over Give access to and then select Specific people from the available choices.
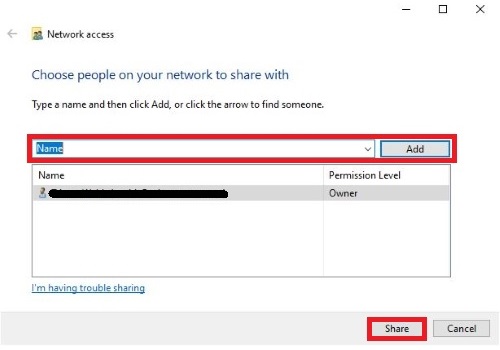
- Within Specific people you can select who you want to share the file or folder with. It is also possible to select people by beginning to type their name in order to narrow down a list of possible choices.
- Once you have selected who you want to share the file with, choose Share to complete the process. The selected person will now have access to this file or folder over the local network.
- In order for this process to work as intended, the selected PCs must be on the same local area network.
Technical Support Community
Free technical support is available for your desktops, laptops, printers, software usage and more, via our new community forum, where our tech support staff, or the Micro Center Community will be happy to answer your questions online.
Forums
Ask questions and get answers from our technical support team or our community.
PC Builds
Help in Choosing Parts
Troubleshooting