
How to use Clipboard History in Windows 10
Description: This article will show you how to use clipboard history in Windows 10. With this feature enabled, you can view all items you have copied, including screenshots taken with the Print Screen key on your computer. These will be stored until the computer is restarted or shut down.
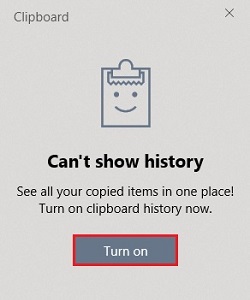
- To open clipboard history, press the Windows key and the letter V on the keyboard at the same time. If clipboard history is not enabled, choose Turn on.
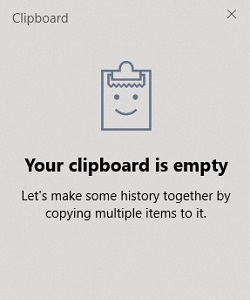
- Once clipboard history is enabled, any future copied items or screenshots taken with the Print Screen key will appear in this menu.
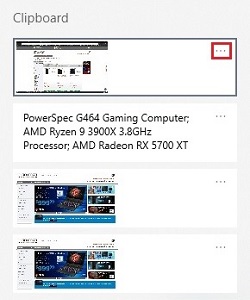
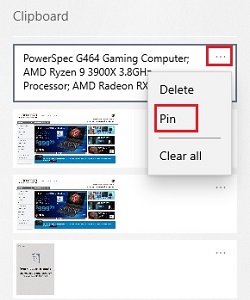
- To make adjustments to the items saved in clipboard history, select the three dots next to a specific item in the list.
- The first option is to Delete – this will remove the specific item from the clipboard history. The second option is to Clear all – this will remove all copied items from the history.
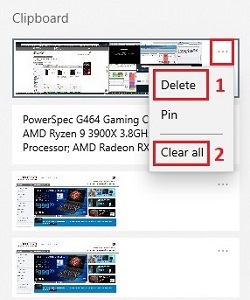
- The other option is to Pin something in clipboard history. This will attach it to the top of the history list.
Technical Support Community
Free technical support is available for your desktops, laptops, printers, software usage and more, via our new community forum, where our tech support staff, or the Micro Center Community will be happy to answer your questions online.
Forums
Ask questions and get answers from our technical support team or our community.
PC Builds
Help in Choosing Parts
Troubleshooting