
How to connect the Camera Module to your Raspberry Pi
Description: This article will show you how to connect the Raspberry Pi Camera Module to your Raspberry Pi. This allows you to take pictures, record video, and apply image effects. You will need a Raspberry Pi with a camera module port and a camera module.
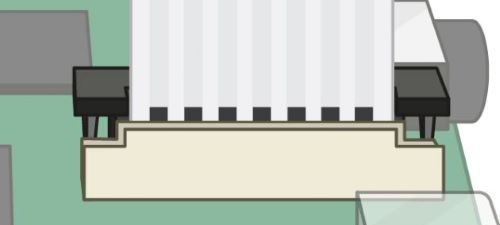
- Connect the camera module by gently pulling up on the edge of the port’s plastic clip. Insert the camera module ribbon cable correctly and make sure the cable is inserted correctly.
- Turn on the Raspberry Pi
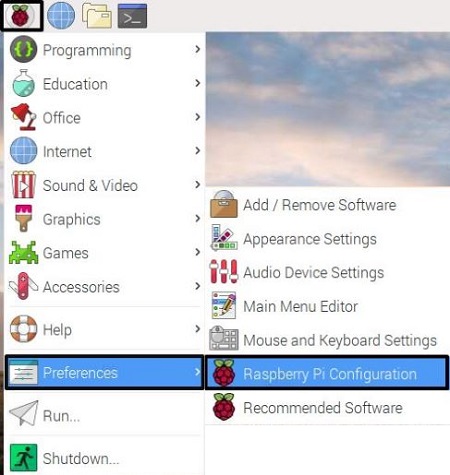
- Select the Raspberry Pi main menu and hover over Preferences.
- Select the Raspberry Configuration Tool.
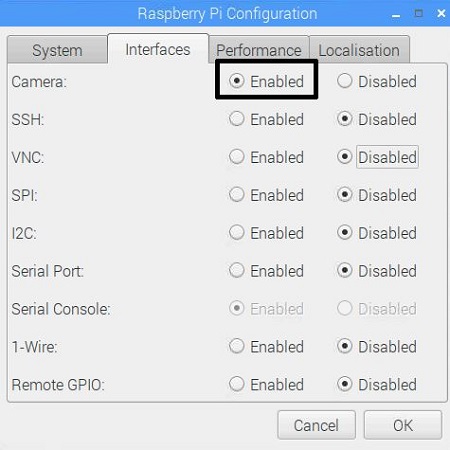
- Select the Interfaces tab and ensure the camera is set to Enabled.
Technical Support Community
Free technical support is available for your desktops, laptops, printers, software usage and more, via our new community forum, where our tech support staff, or the Micro Center Community will be happy to answer your questions online.
Forums
Ask questions and get answers from our technical support team or our community.
PC Builds
Help in Choosing Parts
Troubleshooting