
How to add a Network Printer by IP Address in macOS
Description: This article will show you how to add a wireless printer in macOS by using the printer’s IP address. The printer must support one of these printing protocols: AirPrint, HP Jetdirect (Socket), Line Printer Daemon (LPD), or Internet Printing Protocol (IPP). You must know the network printer’s IP address or host name, printing protocol, and model number or printer software name before you can complete these steps.
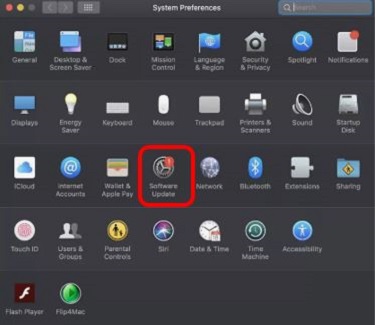
- Update your Mac software by navigating to the Apple Menu and going to System Preferences.

- Choose Software Update and install any software updates listed.
- Connect your printer to the wireless network using the instruction manual that came with the printer. Manuals can also be found on the manufacturer website.
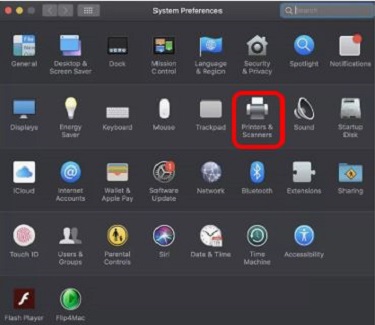
- Open the Apple Menu and go to System Preferences.
- Select Printers & Scanners.
- Click the Add button (+) at the bottom of the list.
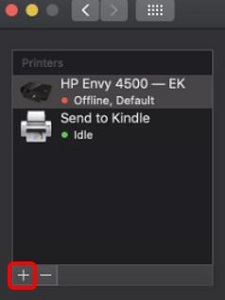
- Choose the IP tab at the top of the window and then enter your printer’s IP address.

Technical Support Community
Free technical support is available for your desktops, laptops, printers, software usage and more, via our new community forum, where our tech support staff, or the Micro Center Community will be happy to answer your questions online.
Forums
Ask questions and get answers from our technical support team or our community.
PC Builds
Help in Choosing Parts
Troubleshooting