
How to set Print Screen to open the Snip and Sketch Tool in Windows 10
Description: This article will show you how to set the Print Screen to open the Snip and Sketch Tool in Windows 10. This will allow you to open the Snip tool to take a screenshot of just part of your screen by pressing the Windows key on your keyboard.
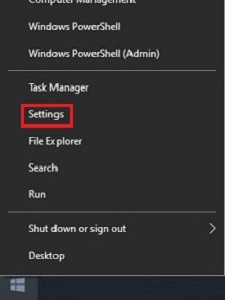
- Right click on the Start button then choose Settings.
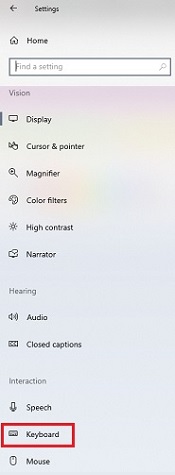
- From the Windows Settings screen that appears, select Ease of Access.

- Under Devices select Keyboard.
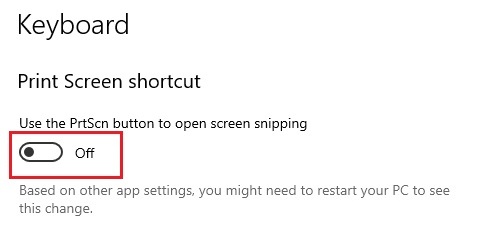
- Under Keyboard options, scroll down to the option for Print screen shortcut and toggle the slider to turn the setting On.
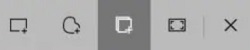
- Pressing the Print Screen key on the keyboard will now open the Snip & Sketch menu at the top of the screen.
Technical Support Community
Free technical support is available for your desktops, laptops, printers, software usage and more, via our new community forum, where our tech support staff, or the Micro Center Community will be happy to answer your questions online.
Forums
Ask questions and get answers from our technical support team or our community.
PC Builds
Help in Choosing Parts
Troubleshooting