Breadcrumbs
How to create a HomeGroup in Windows 7
This article is a how-to document on creating a Windows 7 HomeGroup. A HomeGroup allows Windows 7 computers to easily share documents, pictures, videos, music and other network resources such as printers.
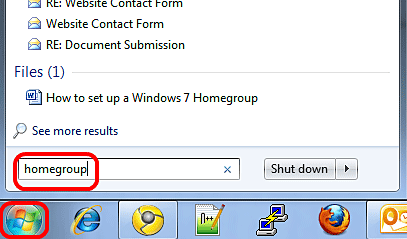
- Click on the Start button and, in the Search Programs and Files box type in "homegroup" without the quotes and press Enter.

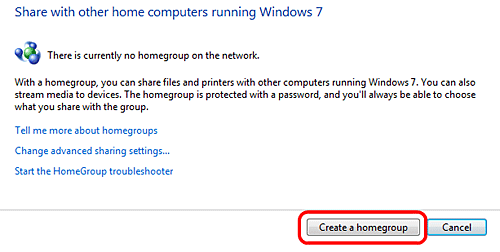
- If no HomeGroup exists on the network, the new screen will display the message: "There is currently no homegroup on the network."

- Click on Create a homegroup.

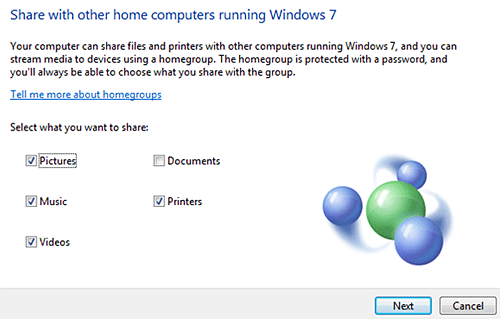
- Choose the types of files and resources to be shared, then click Next.

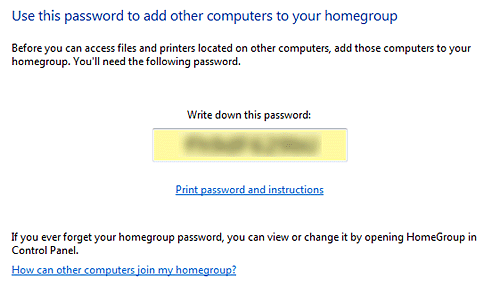
- Write down the password that displays on the screen. Keep in mind that it is case sensitive and must be entered exactly as it is shown. This password will allow other computers to join the HomeGroup.

Technical Support Community
Free technical support is available for your desktops, laptops, printers, software usage and more, via our new community forum, where our tech support staff, or the Micro Center Community will be happy to answer your questions online.
Forums
Ask questions and get answers from our technical support team or our community.
PC Builds
Help in Choosing Parts
Troubleshooting
