Breadcrumbs
How to change the Screen Resolution in Windows 7
This how-to article details the process for changing the screen resolution in Windows 7. This could be useful if the text or pictures on-screen appears distorted or blurry, or when setting up a new monitor.
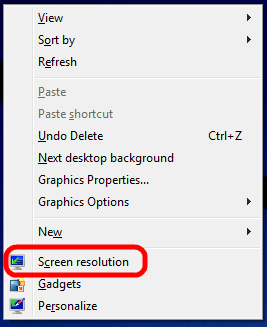
- Right-click on an open area of the desktop and select Screen Resolution.

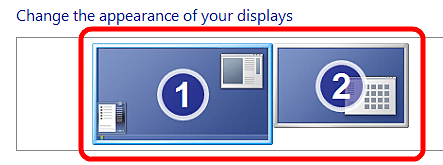
- If multiple monitors in use, click on the monitor to change across the top.

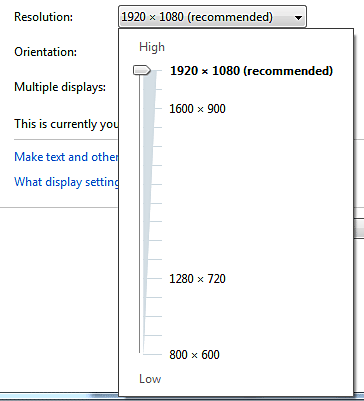
- Choose the Resolution slider and select the appropriate resolution, then hit Apply in the bottom right. The screen may go black for a few seconds afterwards as the new resolution is selected.

- In most cases, the highest resolution will be the best in terms of picture quality, although it will also make everything appear smaller on the screen.
- If the screen goes black and does not come back, do not press any keys - Windows will automatically revert the settings after 30 seconds.
- If the screen does not return after waiting, it may be necessary to power off the computer and start it up in low-resolution mode by tapping the F8 key while starting up the computer. Then, choosing Enable low-resolution video. From there, try another resolution until a working resolution is chosen.
Technical Support Community
Free technical support is available for your desktops, laptops, printers, software usage and more, via our new community forum, where our tech support staff, or the Micro Center Community will be happy to answer your questions online.
Forums
Ask questions and get answers from our technical support team or our community.
PC Builds
Help in Choosing Parts
Troubleshooting
