
How to uninstall Internet Explorer 9 for Windows Vista
The following article describes how to uninstall Internet Explorer 9 in Windows Vista.
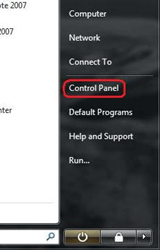
- Click on the Start button in the bottom left, then choose Control Panel on the right.
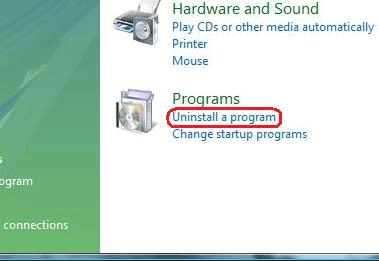
- In the Control Panel, select Uninstall a Program or Programs and Features.
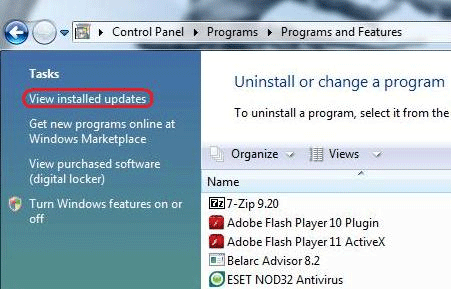
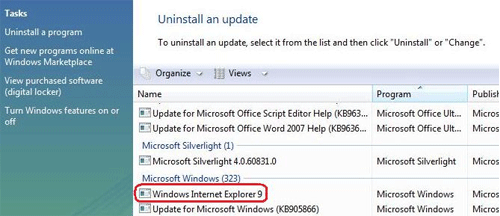
- Click View Installed Updates .
- Scroll down the list to find Windows Internet Explorer 9. Click to highlight it.
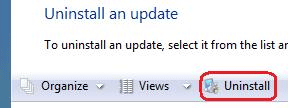
- Click Uninstall above the list of updates.
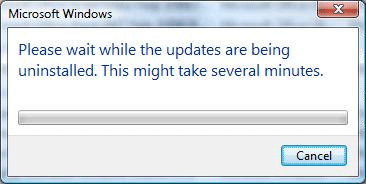
- Wait a moment as it is uninstalled.
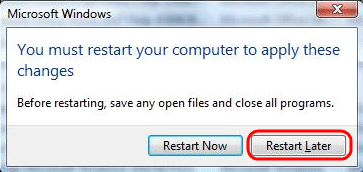
- When prompted to restart the computer, choose Restart Later.
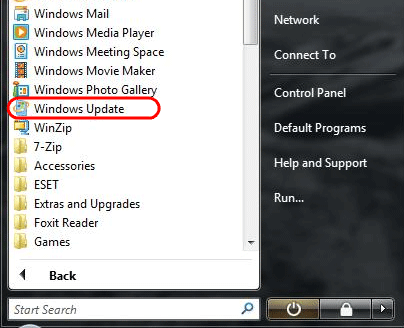
- Click on the Start button in the bottom left corner of the screen, then on the list of programs select Windows Update.
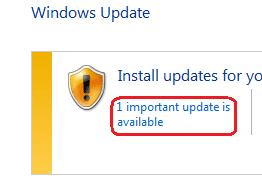
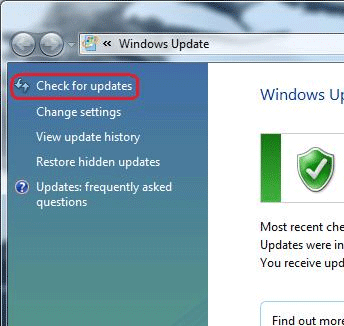
- In Windows Update, choose the Check for Updates option in the top left.
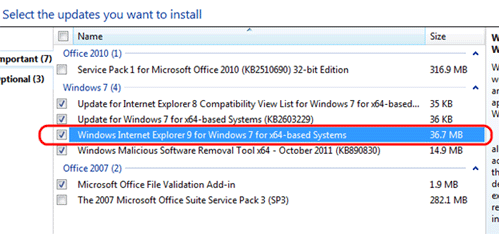
- Once the check is completed, click on the option in the middle that says 1 Important Update is Available
- Note: it may say that more than one update is available.
- Locate Internet Explorer 9 item on the list.
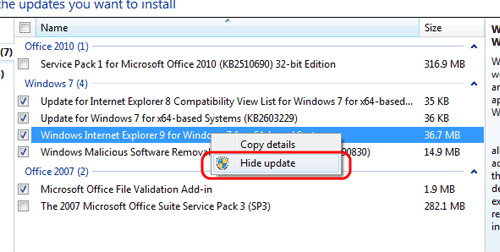
- Right-click on the Internet Explorer 9 update and choose Hide Update.
- Note: This step is optional, and is here to prevent Internet Explorer 9 from being automatically installed again. If you want to reinstall it, skip this step and restart your computer.
- Once finished, restart your computer to complete the process.
Technical Support Community
Free technical support is available for your desktops, laptops, printers, software usage and more, via our new community forum, where our tech support staff, or the Micro Center Community will be happy to answer your questions online.
Forums
Ask questions and get answers from our technical support team or our community.
PC Builds
Help in Choosing Parts
Troubleshooting