
5 Ways to save Space on your Solid State Drive
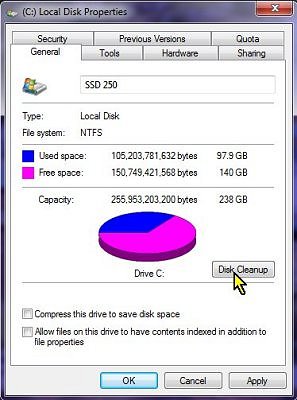
- Run Disk Cleanup: Disk Cleanup can be found in your program list or by right clicking on the drive in Computer. To access the tool from the menu, click Start, All Programs, Accessories, System Tools, Disk Cleanup and select the drive.
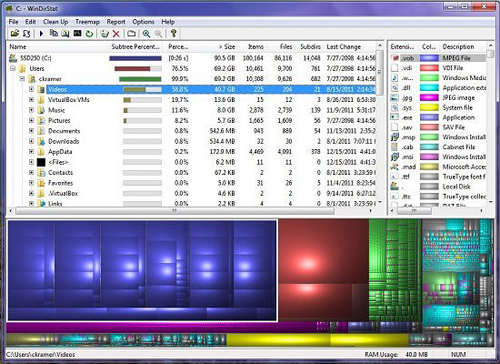
- Download and Run WinDirStat to help identify and remove unneeded files.
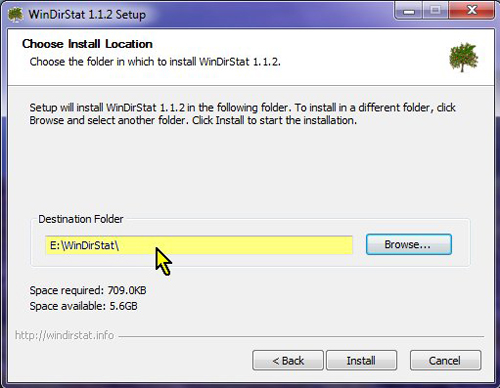
- On a dual drive system, Install your applications to a hard drive. Watch for a prompt for where to install the program. If you don't see a destination choice, you may need to choose to do a Custom Install to have the option.
- Disable virtual memory - set the swap file to zero. If this is a dual drive system with a hard drive as the second drive, move your paging file to a different drive. To do this under Windows 7:
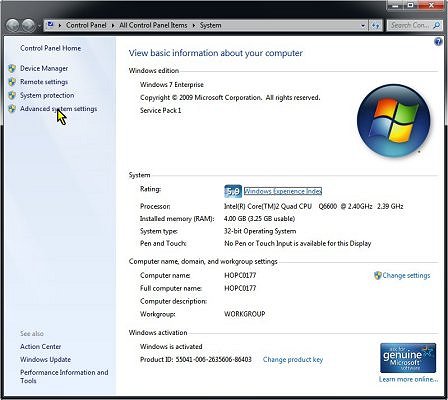
- Press Windows-Pause to open System window (or right click on Computer and select Properties)
- Click Advanced System Settings
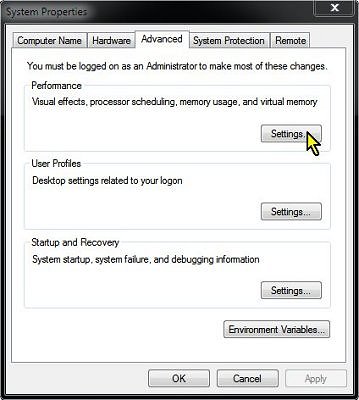
- Select the Advanced tab, and under Performance, click Settings
- Select the Advanced tab, and under Virtual Memory, click Change
- Remove the check next to Automatically manage paging file size for all drives
- Select the SSD drive letter and change the option from System managed size to No paging file
- Optional: if you have a hard disk drive, you can select it and still have virtual memory available by changing the option from No paging file to System managed size or Custom size if you want to limit how much space to use.
- Click OK to save changes.
- Disable hibernate: You can set the idle-time delay before the system enters a sleep or hibernate state under the power settings. While sleep does not use storage space, hibernate does. The hybrid sleep of Vista and Windows 7 will automatically hibernate after a given time in low power sleep mode, unless the timeout is set to never or hibernate is disabled. To disable hibernate in Windows 7, you must have administrator privileges and do the following:
- Open an Administrator Command Prompt window
(Start, All Programs, Accessories, right click on Command Prompt and select Run as Administrator) - At the C: prompt, enter the command powercfg -h off
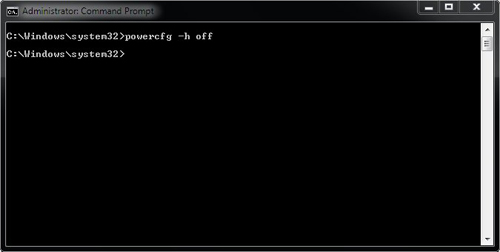
To enable Hibernation again, repeat the process but enter powercfg -h on. If you receive an error: You do not have permission to enable or disable the Hibernate feature, then you did not run the command prompt as an administrator!
To prevent system hibernation from the power settings, do the following:
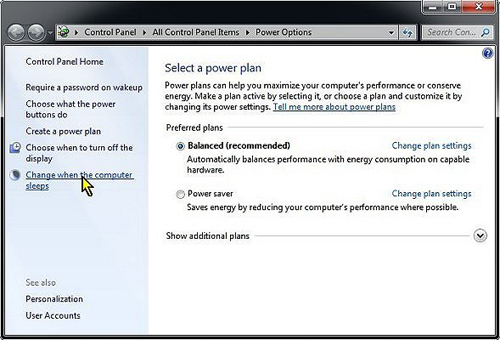
- Open Power Options from the control panel
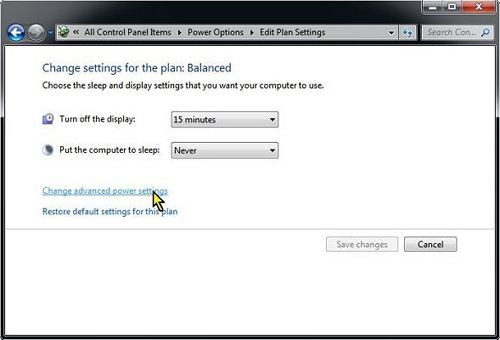
- Click on the task to Change when the computer sleeps
- Click on the option to Change advanced power settings
- Expand the Sleep category, and then expand the Hibernate after line.
- Change all hibernate settings to Never. Click OK to save changes.
- Open an Administrator Command Prompt window
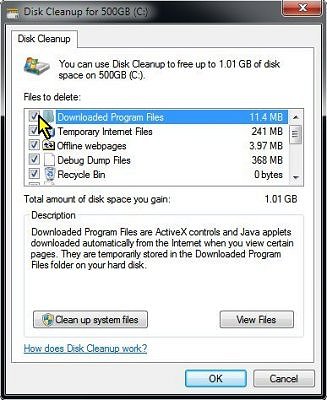
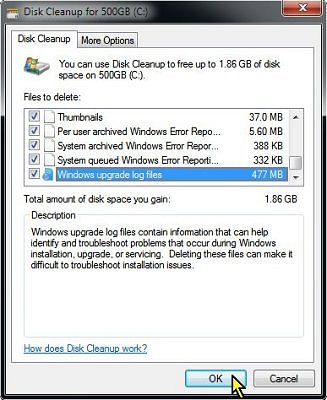
Run Disk Cleanup from the Accessories group under your start menu or by right-clicking on the drive under Computer. Select the types of items to delete and click OK to start the process.
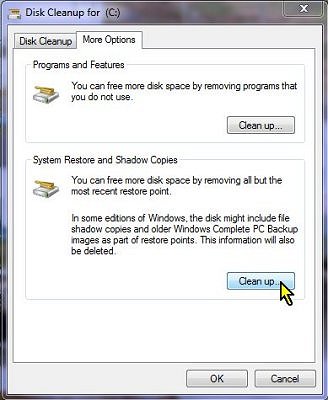
Windows 7 hides some of the cleanup options unless you click the Clean up system files button (requires administrator access). This will add several additional categories of files that can be removed, and a tab called More Options. Under the more options are two options: a button to launch add and remove programs and a button to delete all system restore points except the most recent.
WinDirStat can show you what type of files are using all the space on your drive. Use this to identify files that could be moved to another drive or deleted. More than half of the space on this 250GB SSD drive was taken up with a batch of video files!
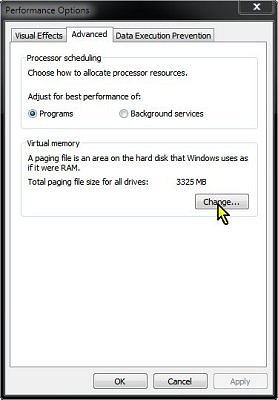
Press the Windows key and the Pause key together to immediately open the system properties window. You can also click on System in the control panel, or right-click on Computer and select properties from the context menu to see this same screen. Click on Advanced System Settings from the task list on the left side of the window. In the System Properties window, select the Advanced tab and then click on the Settings button in the Performance section.
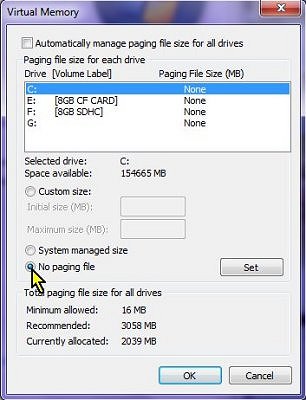
In the Performance Options window, click on the Change button under the Virtual Memory section. The default is for Windows to manage the swapfile, and to create the paging file on your system drive. To set virtual memory to none, to change its size, or to change the drive Windows uses, remove the check from the box at the top. Select the drive you want to change, and then either set your custom size or set it to No paging file to free up space on smaller SSD drives.
Windows will use your SSD or Hard Disk Drive as virtual memory unless you change this setting. A swapfile allows Windows to load more programs or larger data files than you could fit in your existing RAM. However it is much slower, even on a Solid State Drive, and it takes up space (reserved as a hidden system swapfile). With your Paging file size set to none, you must have enough available RAM to open your program or data file, otherwise you could get errors or a not enough memory message. If you have a two-drive system (SSD and HDD), change the location of the swapfile to your HDD to free up SSD space and still have the virtual memory support.
To change the hibernate timeout in Windows, open Power Options in the Control Panel. Click on Change when the computer sleeps in the task list on the left.
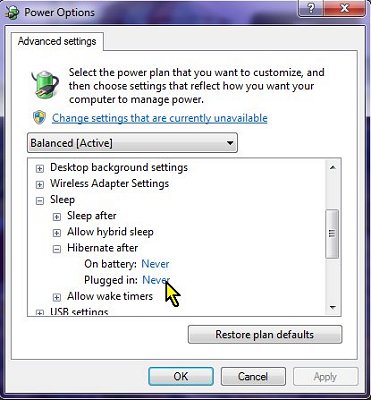
Hibernate is part of the Advanced power settings. Click on the line Change advanced power settings to open the list. In the Power Options list, expand the section called Sleep, and then expand the Hibernate after section. To prevent the computer from entering a hibernate state, and creating a large hiberfile on your drive, set all options in this category to never (how many you have depends if this is a notebook or a desktop system).
Note: changing the hibernate delay through the Power Options only applies to the current power plan, and only applies to the current user. Disabling the hibernate feature using the powercfg command disables it for the computer.
Technical Support Community
Free technical support is available for your desktops, laptops, printers, software usage and more, via our new community forum, where our tech support staff, or the Micro Center Community will be happy to answer your questions online.
Forums
Ask questions and get answers from our technical support team or our community.
PC Builds
Help in Choosing Parts
Troubleshooting