
How to attach a USB Flash Drive in Windows 7 XP Mode
Description: Under XP Mode a flash drive that is inserted shows up for both Windows 7 and Windows XP Mode. In XP Mode it shows up as a network drive with the same letter as it has under Windows 7. Sometimes it will be helpful to have exclusive access to this drive under XP Mode. In that case the drive will need to be attached to XP Mode.
- Open Windows 7 XP Mode: Start » All Programs » Windows Virtual PC » Windows XP Mode.
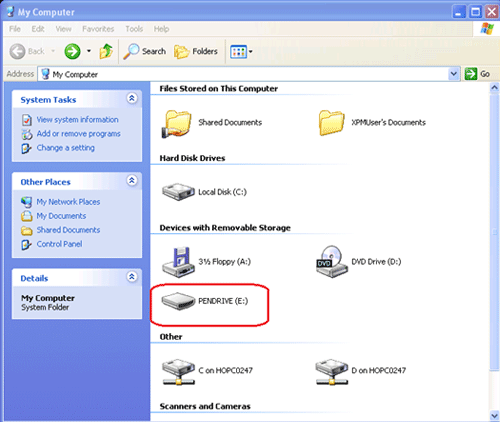
- Insert the Flash drive into a USB port on the computer.
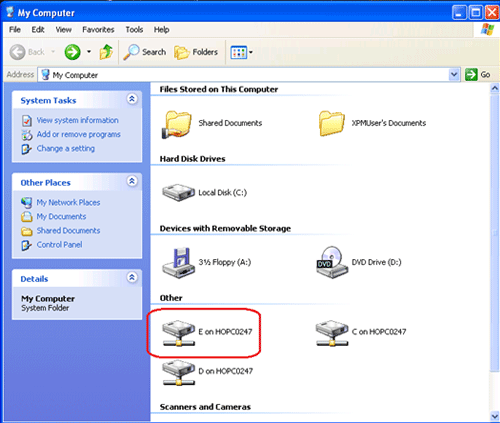
- The drive will now show as a network drive in XP Mode with the same drive letter number as assigned under the Windows 7.
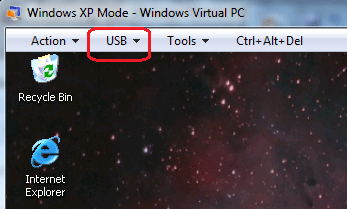
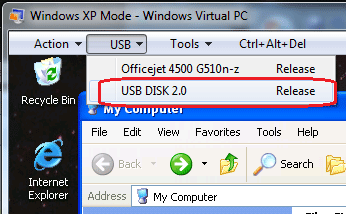
- Click on the USB menu in the title bar.
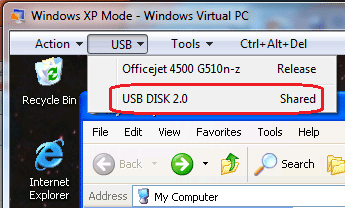
- Click on the USB Disk that appears as Shared.
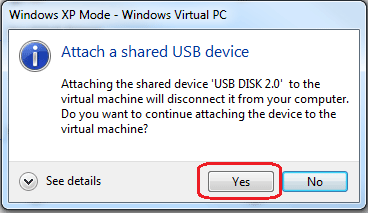
- Click Yes on the warning menu pop up.
- The Drive will now appear as a local drive for Windows XP Mode.
- To release the drive again and share it with Windows 7:
- Click on the USB menu.
- Click on USB Release drive.
- The drive will now appear in both Windows 7 and Windows XP Mode.
Technical Support Community
Free technical support is available for your desktops, laptops, printers, software usage and more, via our new community forum, where our tech support staff, or the Micro Center Community will be happy to answer your questions online.
Forums
Ask questions and get answers from our technical support team or our community.
PC Builds
Help in Choosing Parts
Troubleshooting