

How to change the DNS Settings on a Tenda Router
Description: DNS (Domain Name Service) is normally given to the router by your Internet Service Provider (ISP) but it can be changed to a different service. Here is how to do that in a Tenda Router.
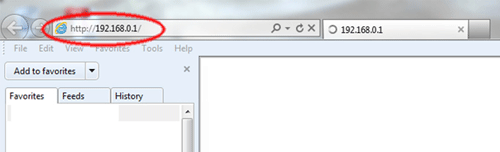
- On any computer that is already connected to the router, open a web browser. In the address bar at the top, type the IP address of the router (the default for Tenda routers is 192.168.0.1) and press the enter key.
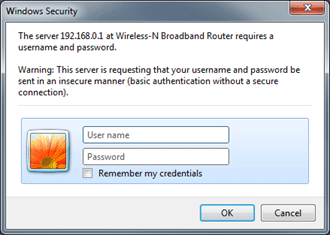
- This will open the Tenda login screen. Type the username and password associated with the router and press OK. (The default username and password are both admin).
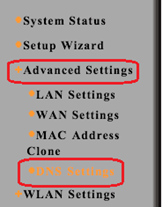
- Click on Advanced Settings then on DNS settings.
- In the middle, click on the check box to the right of DNS settings
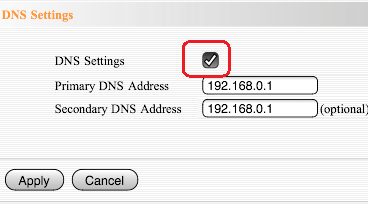
- Then click in the box for the Primary DNS and erase what is there. Do the same for the secondary DNS.
- Enter the new DNS Address from your service provider.
- If you only have one DNS address, then enter that in the Primary DNS address and leave the Secondary blank.
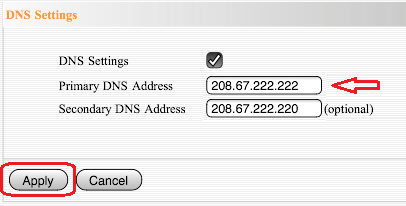
- Click Apply.
- If asked, re-enter the username and password for the router. If you have not changed it, admin is the default for Tenda Routers.
- The DNS is now changed and saved.
Technical Support Community
Free technical support is available for your desktops, laptops, printers, software usage and more, via our new community forum, where our tech support staff, or the Micro Center Community will be happy to answer your questions online.
Forums
Ask questions and get answers from our technical support team or our community.
PC Builds
Help in Choosing Parts
Troubleshooting