Breadcrumbs
How to set up Client Filters on a Tenda Router
Description: Client Filters allow time of day access to the internet by specific computers or a range of computers.
- On any computer that is already connected to the router, open a web browser. In the address bar at the top, type the IP address of the router (the default for Tenda routers is
192.168.0.1) and press the enter key.

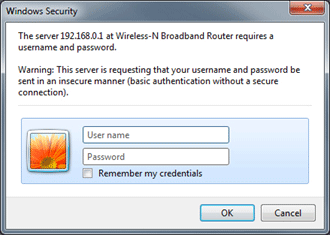
- This will open the Tenda login screen. Type the username and password associated with the router and press OK. (the default username and password are both admin).
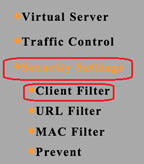
- On the left column click on Security Settings then Client Filter.
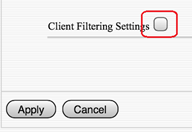
- Click on the Client Filter Settings check box in the middle.
- Several Access policies can be set and the first one is named 1.
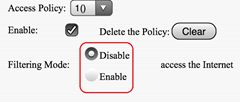
- Check the Enable box to enable policy #1.

- Next choose the filtering mode.
- Disable means that access to the internet will NOT be allowed during the hours and days set below.
- Enable means that access to the internet will ONLY be allowed during the hours and days set below.
- For example, if a business only wants the employees to access the internet during business hours but not during their lunch break, 5 policies can be set. Assuming Business hours from 8 to 5 with a one hour lunch at 12:00 noon. Policy 1 would ENABLE access from 8AM to 12PM. Policy 2 would DISABLE access from 12 PM to 1 PM. Policy 3 Would ENABLE access from 1PM to 5PM. Policy 4 would DISABLE access from 17:00 (5PM) to 23:55 (11:55 PM). Policy 5 would DISABLE access from 0:0 to 8:00 AM.
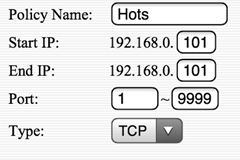
- Give the policy a name.

- Set the range for the computers that will be affected by this policy.
- Refer to articles on:
DHCP and
Static IP address for how to configure the client computers.
- Refer to articles on:
DHCP and
Static IP address for how to configure the client computers.
- Set the port range for the excluded or included ports.
- For the whole range use 1 to 9999.
- Specific ports such as web browsing at Port 80 can be excluded or included according to the policy.
- Set the type of range to be included or excluded - TCP or UDP or Both.
- Set the times and days for the policy to be in effect.
- Note that times only run between Midnight 0:0 and 23:55 PM. A single policy cannot cross over midnight.

- Note that times only run between Midnight 0:0 and 23:55 PM. A single policy cannot cross over midnight.
- Click on Apply.

- You may be asked to enter the router username and password again - admin / admin is the default.
- One policy has now been set. To add additional policies return to the top of the page and select a different policy number and follow the settings in this document for each policy.
Technical Support Community
Free technical support is available for your desktops, laptops, printers, software usage and more, via our new community forum, where our tech support staff, or the Micro Center Community will be happy to answer your questions online.
Forums
Ask questions and get answers from our technical support team or our community.
PC Builds
Help in Choosing Parts
Troubleshooting
