
How to set a Tenda Router to PPPoE
Description: This article will help with the configuration of the Tenda Router to use the protocol PPPoE (point to point protocol over Ethernet). Point to point protocol over Ethernet is used by DSL and some cable providers to allow more control and management to the access accounts. This protocol requires a user name and a password to connect to their Internet provider’s network. The customer will need to contact their Internet Service Provider to obtain the network user name and password.
- The first step is to connect everything. Power down the DSL Modem and the computer(s). Connect the DSL Modem to the Router and with the extra wire connect the computer to the Router. Now let's power up everything one at a time starting with the DSL Modem and then the router and finally the computer.
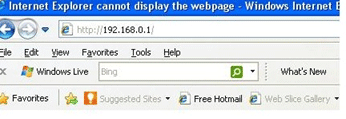
- The next step is to log in to the router using the web based setup page on the router. Open Internet Explorer and type the Router IP address in the address bar at the top of the page. (the default for Tenda routers is 192.168.0.1).
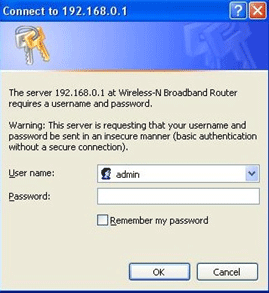
- This will bring up the router login. The Factory log in and password is admin in both sections. (This can be changed to a new user name and password in the web based router settings.)
- After the log in has been completed, the next page will be the internal router web page. This page is used to make changes and set up the router.
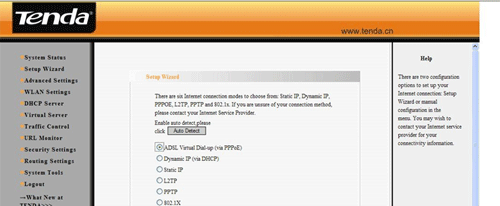
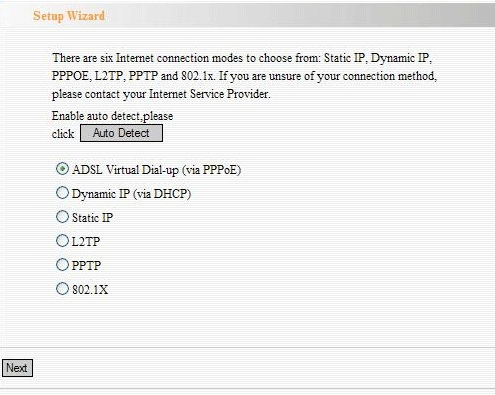
- You will want to click on the setup wizard on the left of the window to start the setup process.
- Put a dot in the ADSL Virtual Dial-up (via PPPoE). This will eliminate the auto-detect process and take you to the next step.
- The next window will be for the user name and password for the DSL network log on.
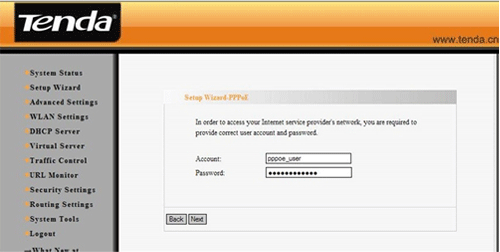
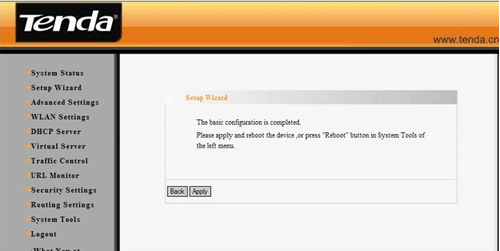
- Clicking next will set the DSL network user name and password to the router. The next step will be to apply the settings.
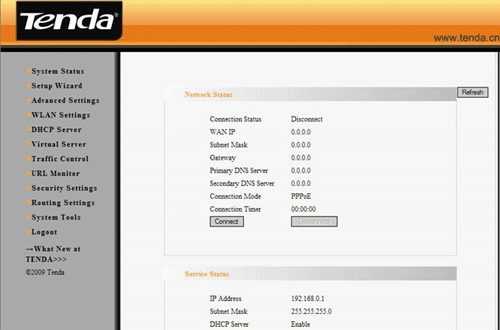
- Once the changes have been applied you will than see a system status window. This window should have all the areas filled with numbers to allow the router to connect to the DSL and then the internet; there should not be any zeros on the status window.
Technical Support Community
Free technical support is available for your desktops, laptops, printers, software usage and more, via our new community forum, where our tech support staff, or the Micro Center Community will be happy to answer your questions online.
Forums
Ask questions and get answers from our technical support team or our community.
PC Builds
Help in Choosing Parts
Troubleshooting