
How to network a Windows 7 PC to a Mac running OS X Part 2: OS X Setup
Description: Now that the Windows side of things is set, this guide will show you how to set up OS X on the network.
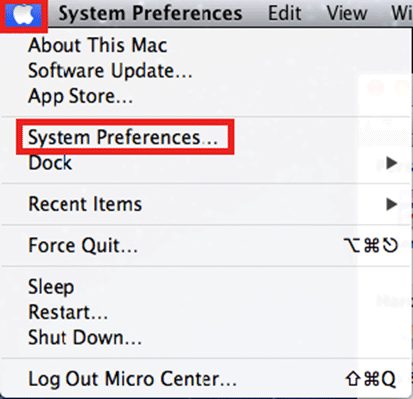
- Click the Apple button in the upper left then select System Preferences.
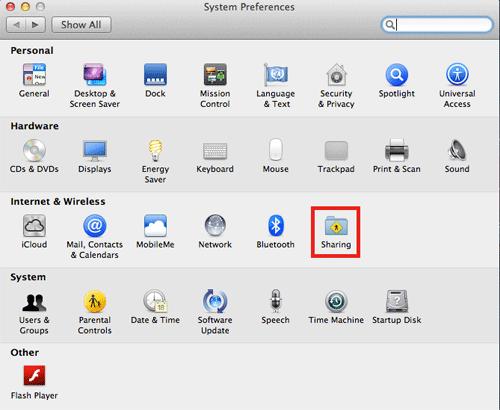
- Within System Preferences select Sharing under the Internet & Wireless heading.
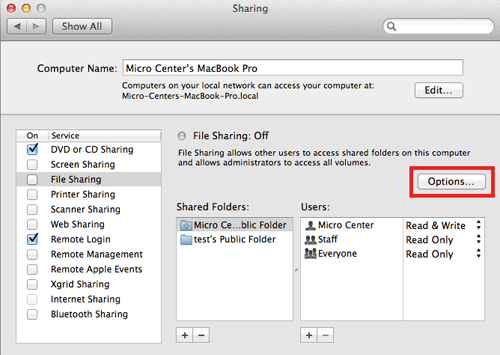
- Click the Options button in the Sharing window.
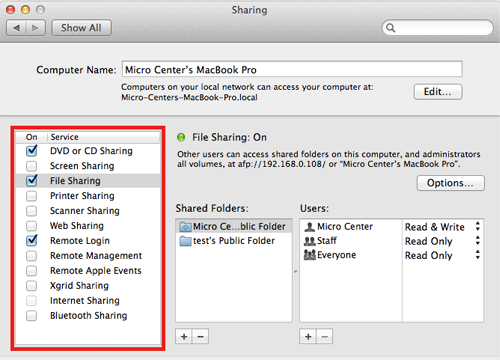
- Make sure both Share files and folders using AFP and Share files and folders using SMB (Windows) are checked along with the current account and click Done.
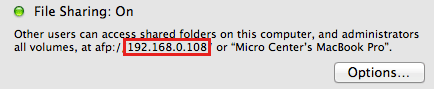
- Select which items are to be shared on the left including File Sharing.
- Make note of the IP address of the Mac listed for future reference listed in this window.
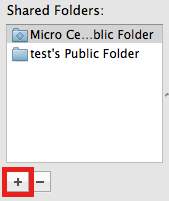
- Click the + below Shared Folders to add any additional folders to be shared.

Now both the Windows 7 machine and the OS X machine are set to share files and folders on the network. Check out our third and final article in this series for information on how to access files between the two computers.
Click Here to continue to Part Three of this series.
Click Here to go back to Part One of this series.
Technical Support Community
Free technical support is available for your desktops, laptops, printers, software usage and more, via our new community forum, where our tech support staff, or the Micro Center Community will be happy to answer your questions online.
Forums
Ask questions and get answers from our technical support team or our community.
PC Builds
Help in Choosing Parts
Troubleshooting