
How to connect to a Network Printer in Windows 7
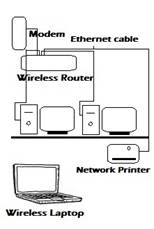
Windows 7 can discover printers and other computers that are on the same network. This article will demonstrate using network discovery to find and install a printer resource available on the network.
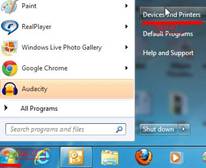
- Click Start and then click Devices and Printers
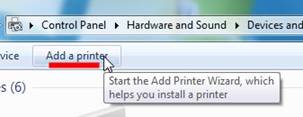
- Click on Add a printer
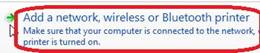
- Click on Add a network, wireless or Bluetooth printer
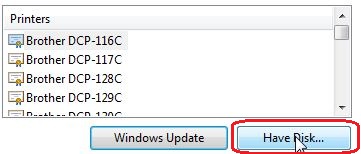
- Click on Have Disk and insert the disk or CD that came with your printer.
- Select the printer model from the list and click Next. Windows will install the printer software and or drivers on the computer. If you have more than one computer or laptop on the network, repeat the process on each system.

- Once installation is done you can change the default printer to use or select the printer from within your print menu of your application.
Note: Make sure all the computers and printer are on same network or connected to the same router. If you have more than one printer configured on your computer make sure you select the appropriate printer before you are start to print.
Technical Support Community
Free technical support is available for your desktops, laptops, printers, software usage and more, via our new community forum, where our tech support staff, or the Micro Center Community will be happy to answer your questions online.
Forums
Ask questions and get answers from our technical support team or our community.
PC Builds
Help in Choosing Parts
Troubleshooting