
How to use Boot Camp to install Windows 7 in Mac OS X
Description: Making the jump from Windows to a Mac, but still want to be able to use Windows? The Mac operating system has a utility that allows for an easy install of Windows alongside of the Mac operating system.
NOTE: This will only work with a genuine copy of Windows. The genuine product key must be available and not in use with another install on a separate machine.
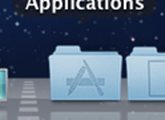
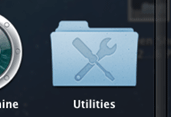
- Begin by clicking the Applications folder on the dock. Then, click Utilities.
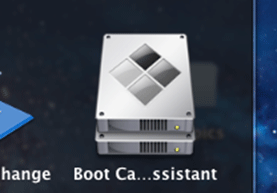
- Once in the Utilities folder, open Boot Camp Assistant by clicking on it.
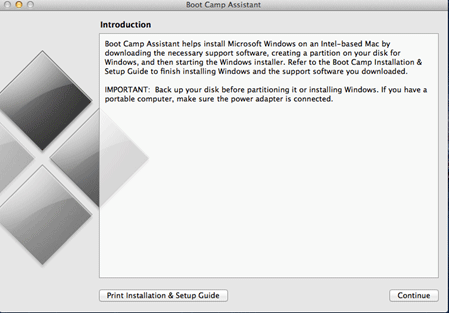
- Read through the introduction, and then click Continue.
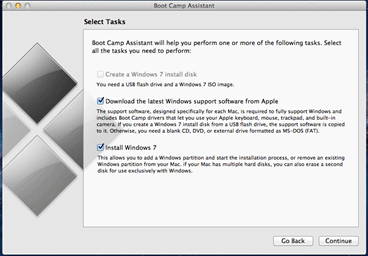
- On the following page, make sure the boxes for Download the latest Windows support software and Install Windows 7 are both checked. This will ensure the most up to date drivers and software are installed.
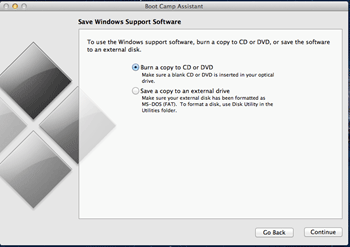
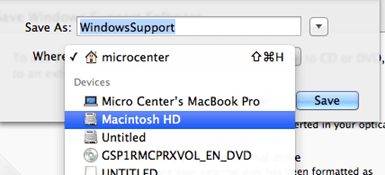
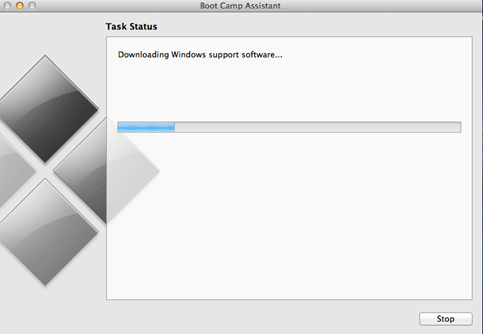
- The next page is where the drivers and utilities for Windows will be downloaded. These are required for Windows functionality. The two methods available are Burn to CD/DVD and Save a copy to an external drive. Choose the desired method and click Continue. It will then prompt a destination to save to. Insert a disc or external media, and locate it in this list. Then, click Save. It will begin the download and it will save it by default as a file named WindowsSupport.
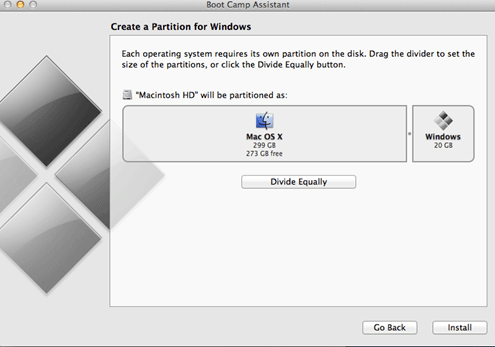
- Once completed, the assistant will move on to the next page. On this page, select the desired space to give to Windows on the hard drive. Click and drag the circle in the divider to allow more or less space for each OS.
- Once the desired capacity is selected, insert the Windows disc and click Install. It will begin to partition the disk drive, and once that has completed, it will restart into the Windows setup process.
- Follow through the Windows install. (for a guide on installing Windows 7, click here.)
- During the install process, a screen will appear listing all partitions. One will be labeled BOOT CAMP. It is normal to receive a message stating You cannot install Windows to this drive as it is not in a file structure Windows can understand. To alleviate this, select the drive labeled BOOT CAMP and then select the Format option. This will format it to a disk structure the Windows installation can recognize.
- The machine will now boot into Windows. First time set up is required (Computer name, password, etc).
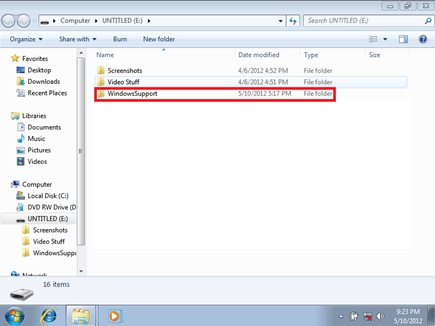
- Once in Windows, insert the removable media created earlier to install Windows drivers. Navigate to the location and look for the folder named Windows Support (or the different name given earlier) and click on it to open.
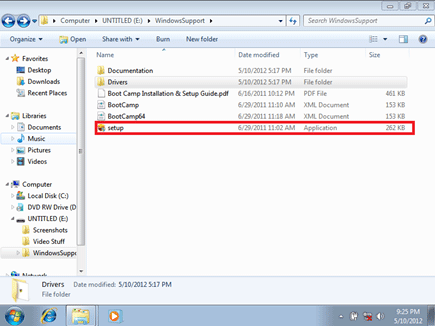
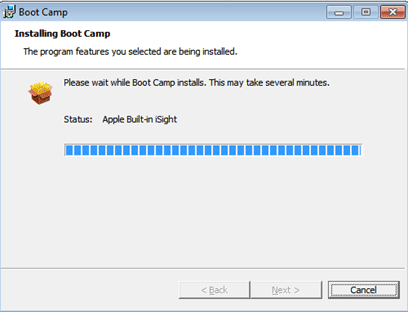
- Inside the folder, look for an icon labeled Setup. Click on this to install Boot Camp in Windows. This will also install all the drivers needed to run Windows on the Mac. Once the install has completed, Restart the computer.
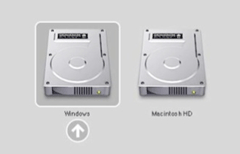
- The process is now completed. To switch between the Mac OS and Windows, hold the Option (Alt) key right as the Apple logo appears when the computer first turns on. Then, select the desired OS.

Technical Support Community
Free technical support is available for your desktops, laptops, printers, software usage and more, via our new community forum, where our tech support staff, or the Micro Center Community will be happy to answer your questions online.
Forums
Ask questions and get answers from our technical support team or our community.
PC Builds
Help in Choosing Parts
Troubleshooting