Breadcrumbs
How to set up a WinBook Security Camera over a Wired Ethernet Connection
Description: The WinBook Network Security Camera can connect to a network via Ethernet or a wireless connection. This article will detail the steps required to connect it to a network using an Ethernet connection.
- Make sure the camera is plugged in to a power outlet using the included power adapter. This will be connected to the back of the camera.
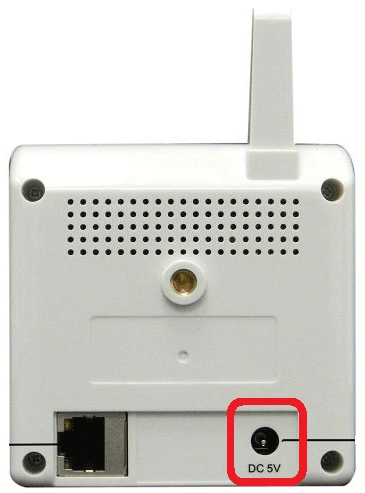
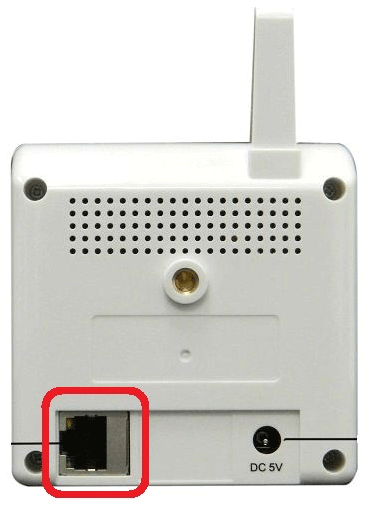
- Using an Ethernet cable, connect one end to the back of the camera in the Ethernet port, and the other end to one of the LAN ports on the router.
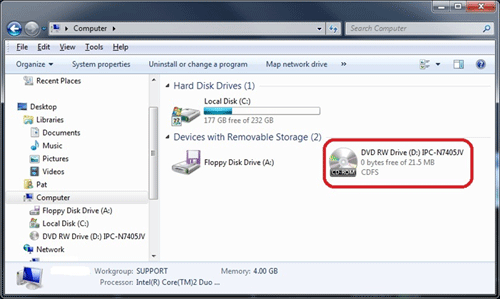
- Insert the camera's installation disk into the computer.
- Go to My Computer (if running Windows XP), or Computer (if running Windows Vista or Windows 7) and double click the CD/DVD drive to open the disk to view the files.
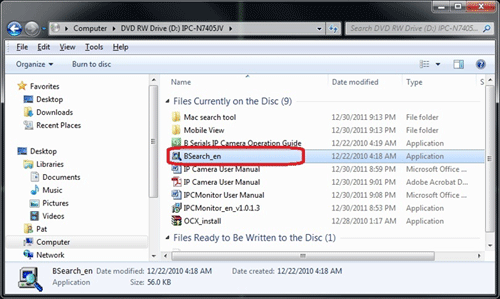
- Double-click the BSearch_en application to open it.
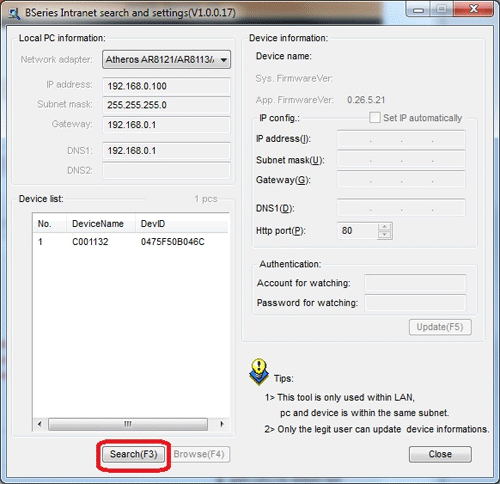
- Click Search(F3) to search for the camera.
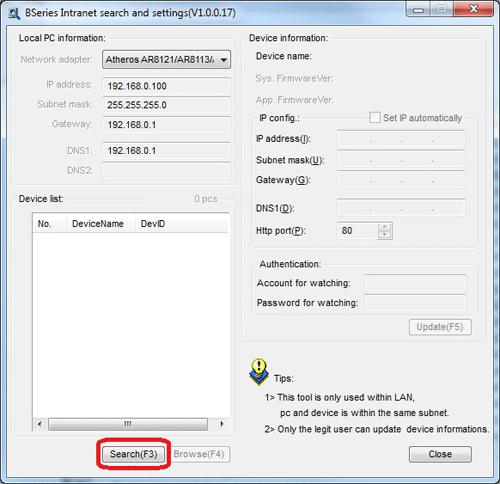
- The camera will appear under the Device List. Click on it to select it.
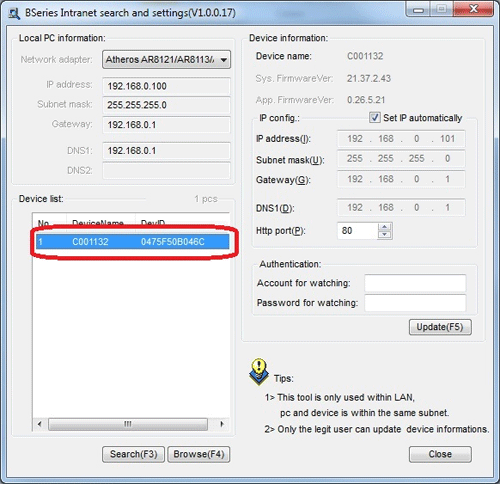
- Under the Authentication section, next to Account for watching enter admin. Next to Password for watching enter 123456
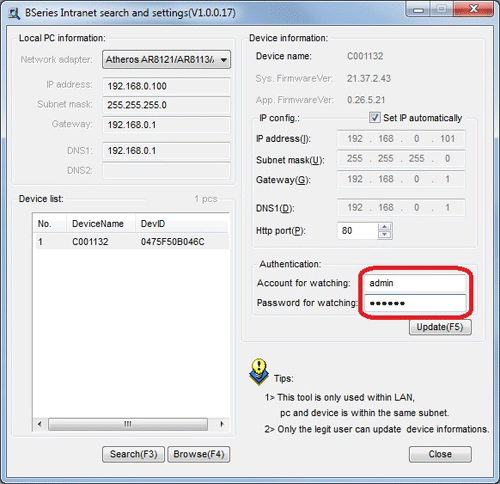
- Click Update(F5).
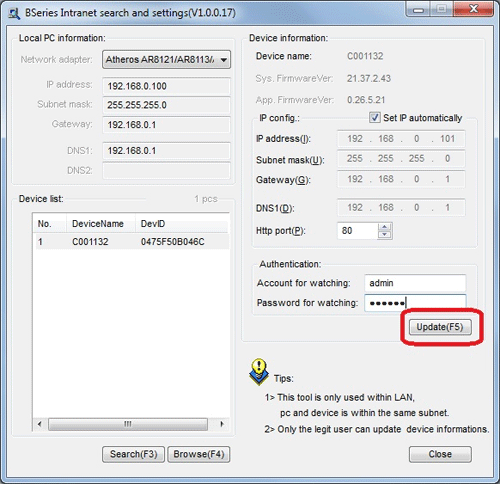
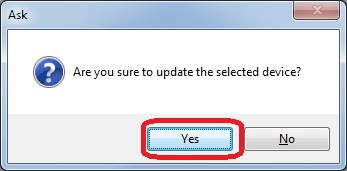
- Click Yes on the message that says Are you sure to update the selected device?
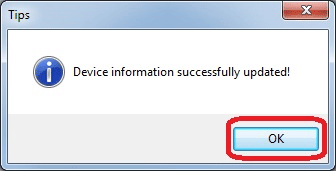
- Click OK on the confirmation message.
- Go back to the BSearch application and click Search(F3).
- Select the device, then click Browse(F4).
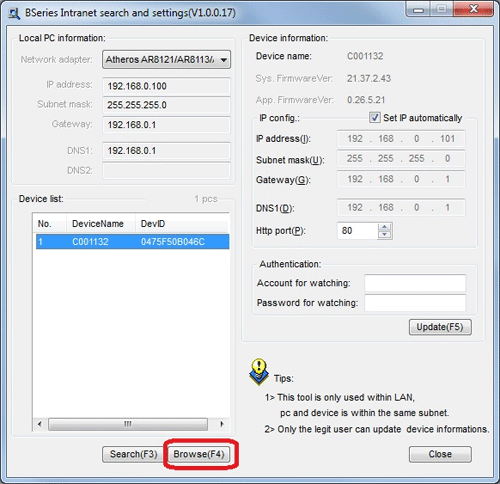
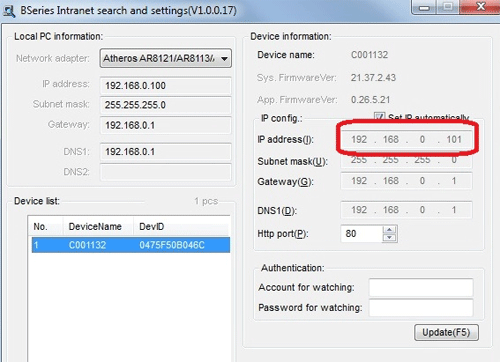
- This will bring up the default web browser with the camera's IP address entered into the address bar at the top. If it does not, open Internet Explorer and type in the camera's IP address into the address bar and hit Enter on the keyboard. The camera's IP address will be shown in the BSearch application under the IP address field.
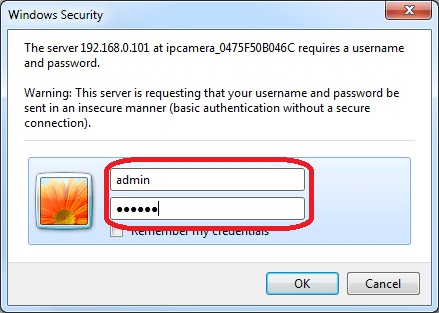
- A Windows Security message will appear requesting a username and password. Enter admin for the username and 123456 as the password. Click Ok.
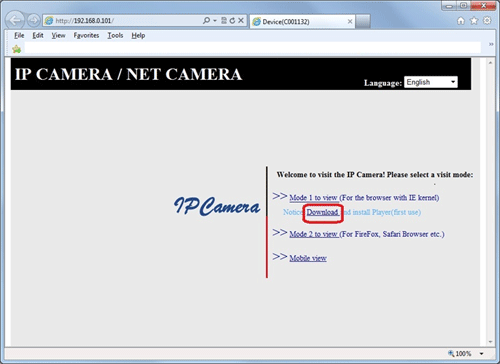
- The player extension will need to be downloaded. Click on the download link on the webpage.
- When prompted, click Run.

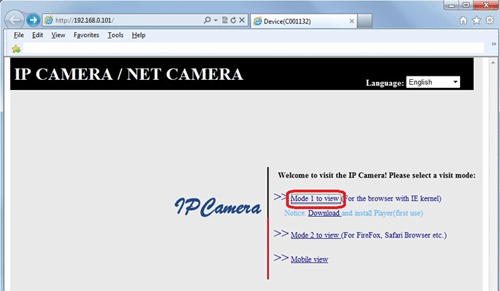
- Click Mode 1 to view on the webpage.
- When prompted, click Allow in order to run the add-on.

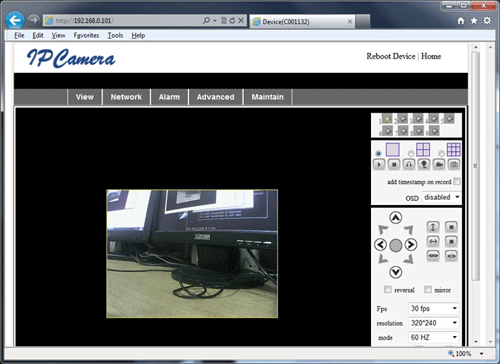
- The camera feed can now be viewed from Internet Explorer.
Technical Support Community
Free technical support is available for your desktops, laptops, printers, software usage and more, via our new community forum, where our tech support staff, or the Micro Center Community will be happy to answer your questions online.
Forums
Ask questions and get answers from our technical support team or our community.
PC Builds
Help in Choosing Parts
Troubleshooting
