
How to set up a WinBook Security Camera over a WiFi Connection
Description: The WinBook N7405JV Network Security Camera can be connected to the network via Ethernet or a Wireless connection. This article will detail the steps on how to set it up wirelessly.
- Insert the installation disk for the network security camera.
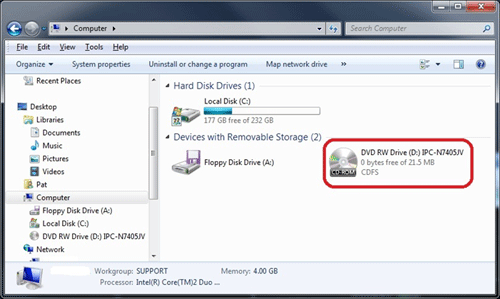
- Go to My Computer (if running Windows XP), or Computer (if running Windows Vista or Windows 7) and double click the CD/DVD drive to open the disk to view the files.
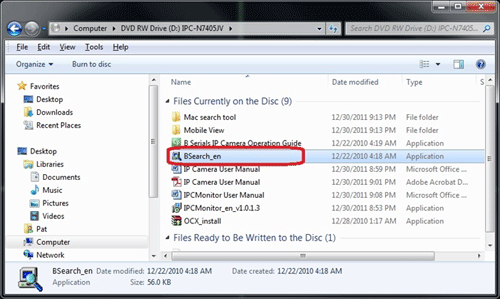
- Double-click the BSearch_en application to open it.
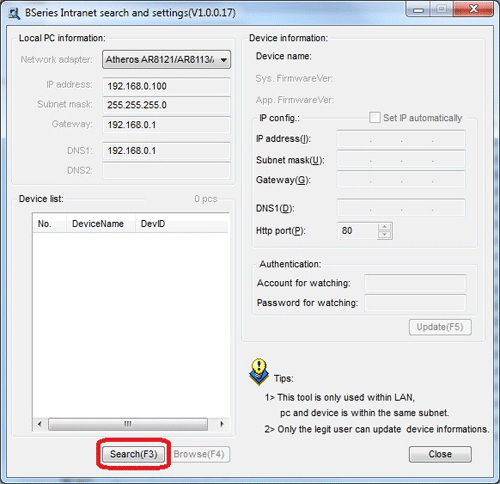
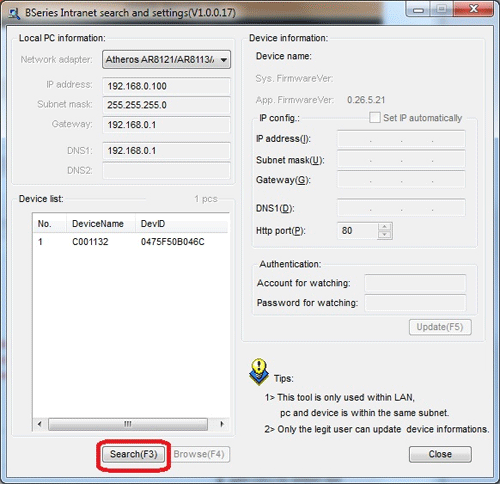
- Click Search(F3) to search for the camera.
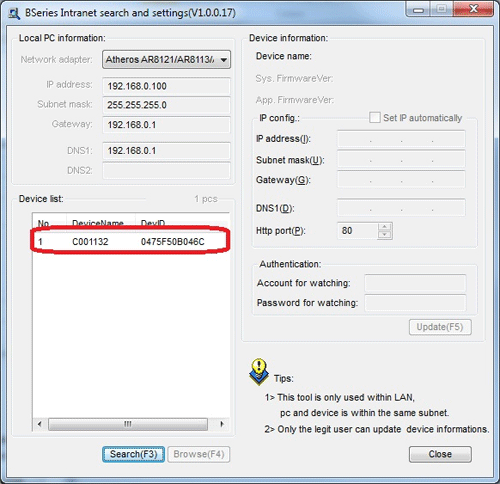
- The camera will appear under the Device List. Click on it to select it.
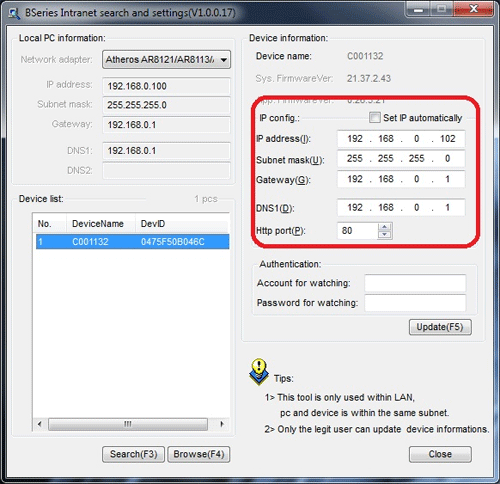
- In the IP config section, if there is a check in the box next to Set IP automatically, click in the box to remove the check. The IP configuration information will need to be set up manually in order to connect the camera wirelessly to the network.
- To obtain the network's IP configuration information, click the Start Button, then type cmd in the search box at the bottom and click Enter. If the computer is running Windows XP, click the Start Button, click Run then type cmd and click Enter.
- In the command prompt, type ipconfig and click Enter.
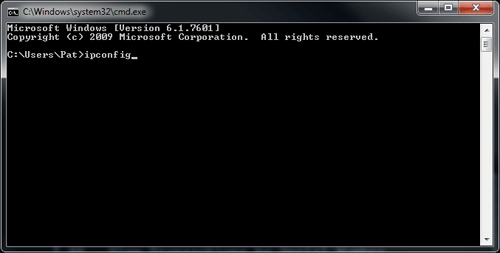
- Take note of the Default Gateway and the Subnet Mask.

- Go back to the BSearch utility. In the IP config section, enter a valid IP address for the camera. For example, if the Default Gateway is 192.168.1.1, then a valid IP address would be 192.168.1.x (x standing for any number between 2 and 254). If the Default Gateway is 192.168.0.1 then a valid IP address would be 192.168.0.x. For best practice, since likely numbers in the lower range may be already assigned to other devices, it is recommended to use a higher number for x. So, if the Default Gateway is 192.168.0.1, then a good IP address to try for the camera would be 192.168.0.102. Enter the chosen IP address in the corresponding field.
- Enter the correct Subnet Mask and Gateway in the corresponding fields, referring to the IP configuration information in the Command Prompt window. For the
DNS1 field, enter the same address as the Default Gateway.
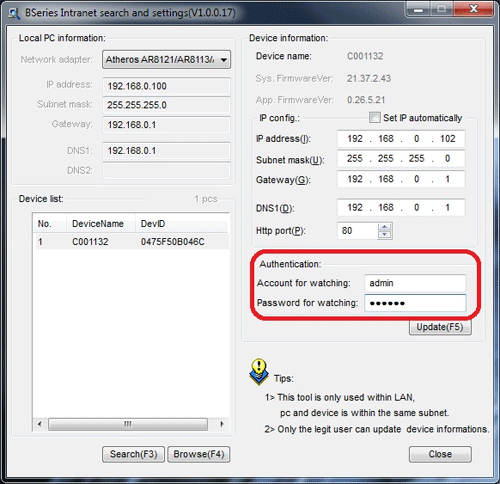
- Under the Authentication section, in the box next to Account for watching enter admin.
- In the box next to Password for watching enter 123456.
- Click Update(F5).
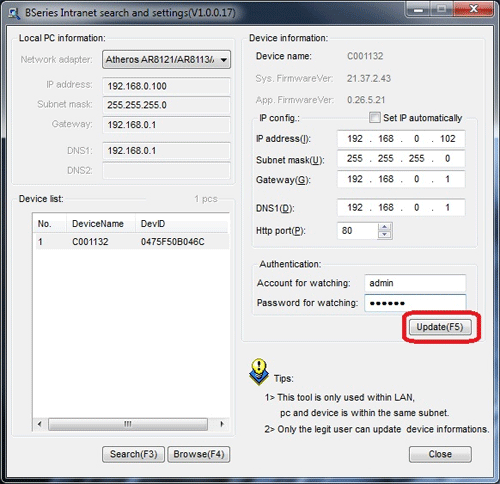
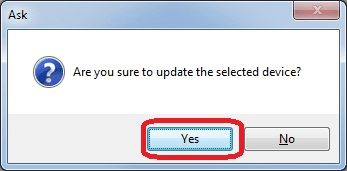
- Click Yes on the message that says Are you sure to update the selected device?
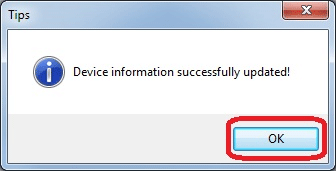
- Click OK on the confirmation message.
- Go back to the BSearch application and click Search(F3).
- Select the device, then click Browse(F4).

- This will bring up the default web browser with the camera's IP address entered into the address bar at the top. If it does not, open a web browser and type in the camera's IP address into the address bar in the upper left and press Enter on the keyboard.
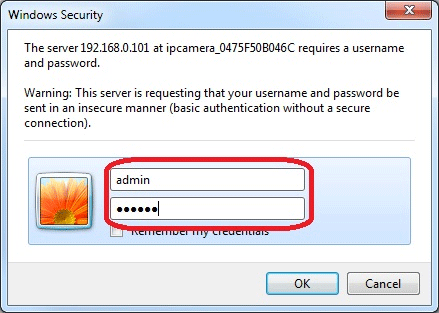
- A Windows Security message will appear requesting a username and password. Enter admin for the username and 123456 as the password. Click OK.
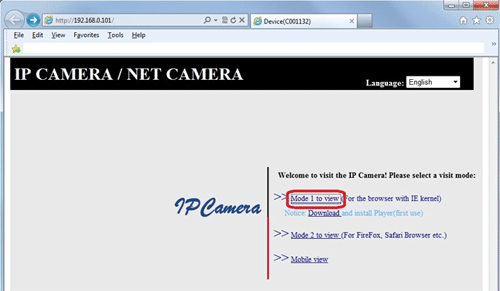
- Click Mode 1 to view.
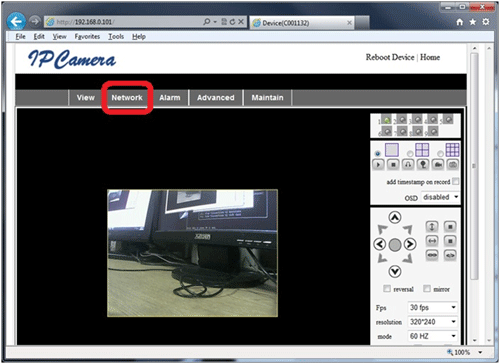
- Click Network at the top.
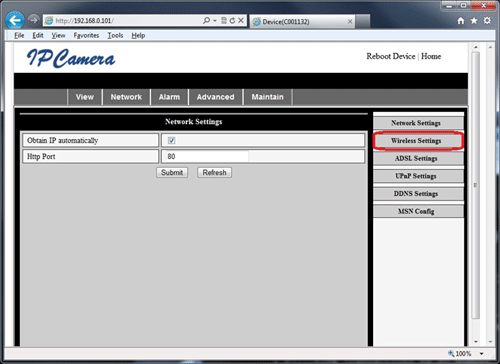
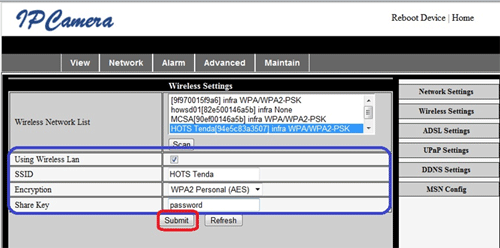
- Select Wireless Settings.
- Click Scan.

- Click on the wireless network the camera is to be connected to.
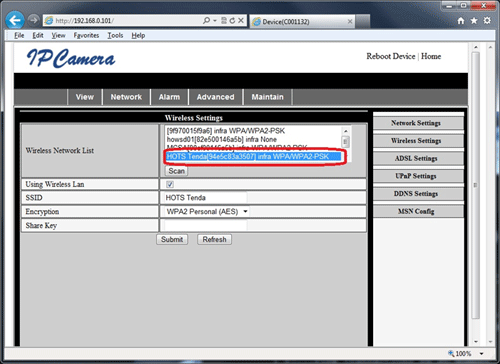
- Make sure to enter the correct network security information, including the Share Key. Then click Submit.
- The camera will reboot automatically.
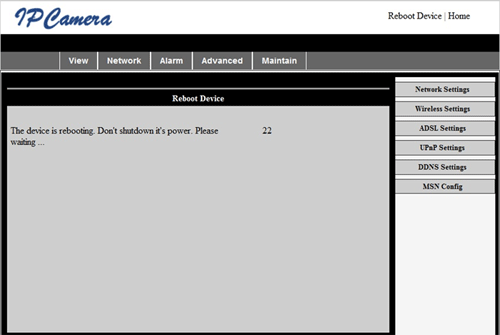
- Once it is finished rebooting, disconnect the camera from the Ethernet and it will now be connected wirelessly.
Technical Support Community
Free technical support is available for your desktops, laptops, printers, software usage and more, via our new community forum, where our tech support staff, or the Micro Center Community will be happy to answer your questions online.
Forums
Ask questions and get answers from our technical support team or our community.
PC Builds
Help in Choosing Parts
Troubleshooting