
How to add a network printer by IP Address
Description: This article is a How-to document on adding a printer over the network via a known IP address in Windows 7. The steps may be similar in Windows XP and Windows Vista, so this article can be used as a general guideline for those procedures as well.
- Ensure that the computer and the printer are connected to the same network (connected wired or wirelessly to the same router or switch.)
- Power on the printer and check the IP address on the printer itself. Note that this process varies greatly by printer, however there should be some sort of menu or configuration option on the printer which will allow you to either read or print out the IP Address.
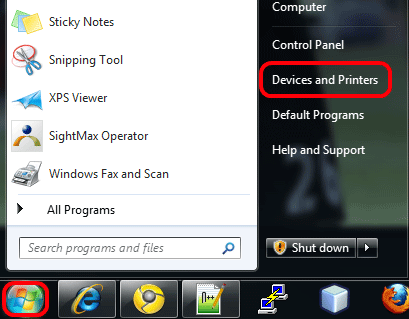
- On the computer, go to the Start button in the bottom left, then click on Devices and Printers.
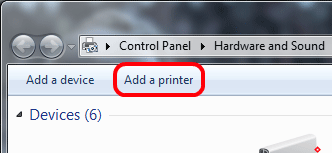
- Click on Add A Printer along the top of the new window.
- Although it may seem counter-intuitive, choose Add A Local Printer.
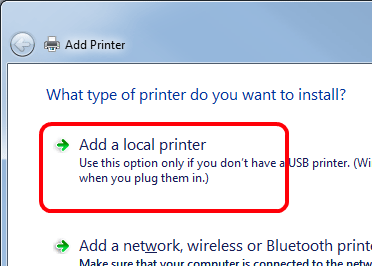
- The computer sees a TCP/IP port (necessary for connecting the computer via its IP Address) as a local port, even though the printer is not directly plugged in to the computer.
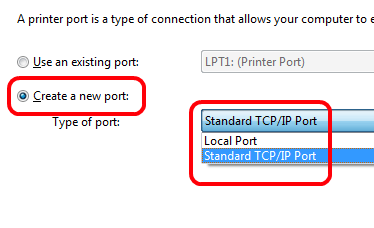
- Choose Create A New Port and then choose Standard TCP/IP Port
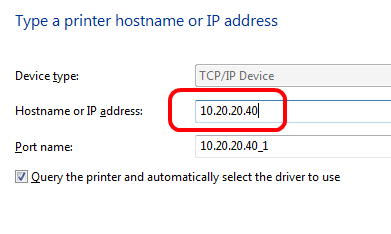
- In the Hostname or IP Address box, enter the IP Address of the printer. The Port Name box will fill in automatically.
- Windows will take a moment and attempt to automatically install the printer. In many cases, this is the last step. If Windows is not able to install the printer drivers automatically, it may ask for drivers. Unless otherwise specified by the manufacturer, choose the Windows Update option to let Windows attempt to automatically download and install the drivers.

- If not, attempt to locate the driver from the list by manufacturer and model to install from the pre-prepared list of printer drivers.
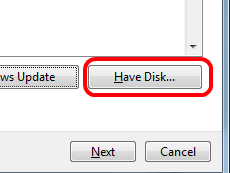
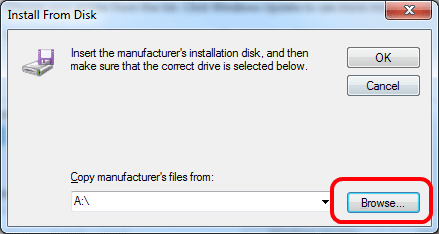
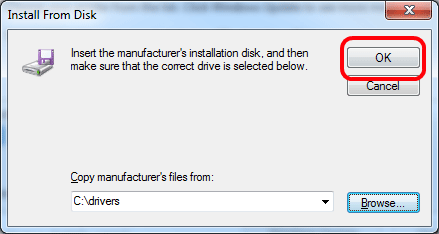
- If it is not available there, choose the Have Disk option to install drivers manually downloaded from the manufacturer.
- Click on Browse to locate the drivers.
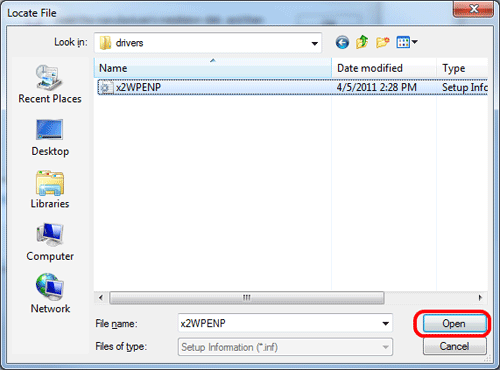
- Locate the driver and click Open.
- Click OK.
- Select the driver from the list and then click Next.

- If desired, enter a customized printer name. This will not affect the functionality of the printer.
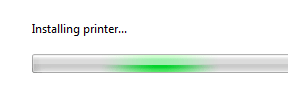
- Wait as Windows installs the printer.
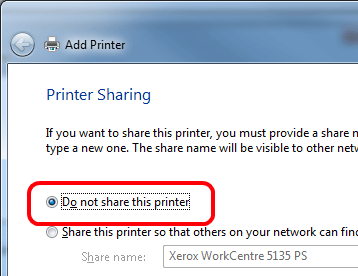
- Choose the Do Not Share this Printer option as the printer is already set up as a network printer, then click Next.
- If desired, check the Set As the Default Printer box to set the printer to the default printer.
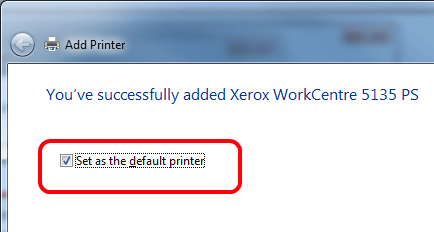
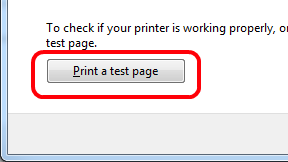
- If desired, print a test page to ensure that the printer does work correctly.
- Click Finish and use the printer as normal.
Technical Support Community
Free technical support is available for your desktops, laptops, printers, software usage and more, via our new community forum, where our tech support staff, or the Micro Center Community will be happy to answer your questions online.
Forums
Ask questions and get answers from our technical support team or our community.
PC Builds
Help in Choosing Parts
Troubleshooting