
How to enable or disable a Network Connection in Windows 7
Description: This article will show you how to enable or disable a network connection in Windows 7.
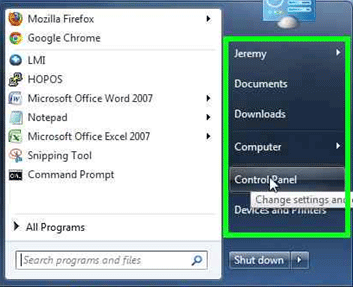
- Click Start and then click Control Panel.
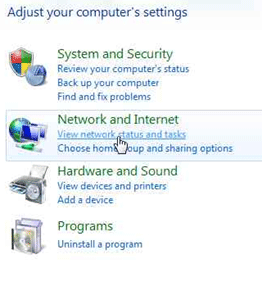
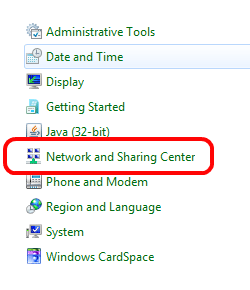
- Beneath Network and Internet, click on View network status and tasks (if in category mode) or click on Network and Sharing Center (if in list mode).
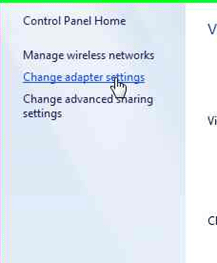
- On the top-left hand corner, click on Change adapter settings.
- Next, right-click either on Local Area Connection or Wireless Network Connection (depending on which one you want to modify). The top option will then allow you to Enable or Disable that network connection by clicking on it.
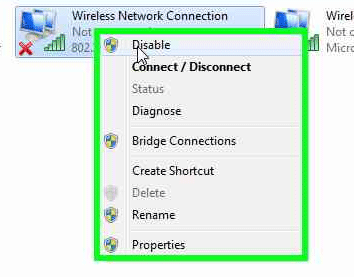
- By disabling a network connection, this will force your computer to only connect to the one that is left enabled.
Technical Support Community
Free technical support is available for your desktops, laptops, printers, software usage and more, via our new community forum, where our tech support staff, or the Micro Center Community will be happy to answer your questions online.
Forums
Ask questions and get answers from our technical support team or our community.
PC Builds
Help in Choosing Parts
Troubleshooting