Breadcrumbs
How to print wirelessly using a Time Capsule in OS X Mountain Lion
Description: This tutorial will show you how to add a printer that does not have wireless functionality and make it so that you can print wirelessly to it. This will require a printer with a USB or Ethernet connection and a Time Capsule.
- First you will need to install the printer on the Apple computer you want to print from. Open System Preferences and click on Print & Scan.
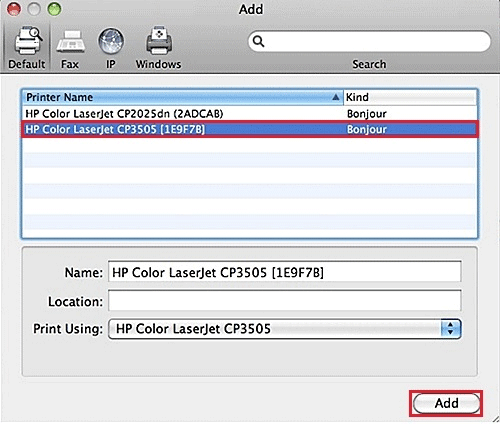
- Mountain Lion should automatically see the printer and put it in a list that you can click on. After selecting your printer click Add.
- The service called Bonjour will check for the driver and then search the web for the latest driver for the printer. After clicking on Install, the driver will be downloaded and installed automatically.
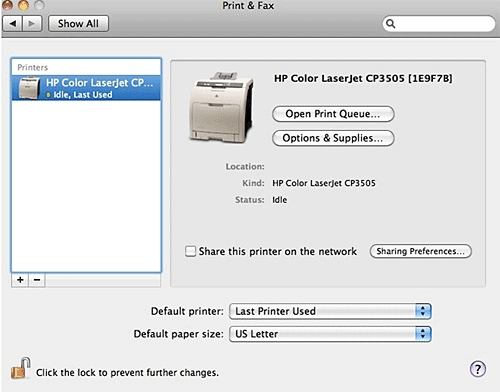
- After Bonjour is finished, the printer will show up on the left side with all of your other printers.
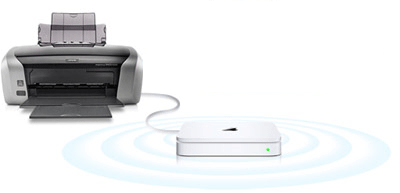
- Disconnect the printer from the computer and plug it into the Time Capsule.
- If you are not connected wirelessly already to your Time Capsule, connect up to your Time Capsule using your AirPort. After connecting, when you go to print the document/photo, you should see your printer that you just installed!


Technical Support Community
Free technical support is available for your desktops, laptops, printers, software usage and more, via our new community forum, where our tech support staff, or the Micro Center Community will be happy to answer your questions online.
Forums
Ask questions and get answers from our technical support team or our community.
PC Builds
Help in Choosing Parts
Troubleshooting
