Arduino Workshop - Project 01: Blinking LED


Hardware Required:
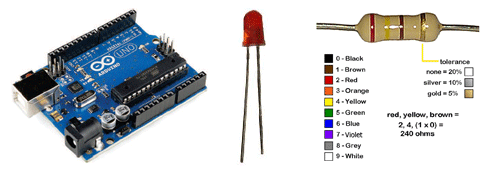
  • Arduino Uno board
  • LED (any color)
  • 330 ohm resistor
  • jumper wires


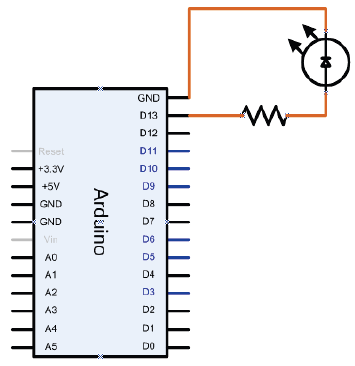
Schematic:


Note: most Arduino modules have an LED connected to D13 already. Your LED should blink at the same time it does.

Project Steps:

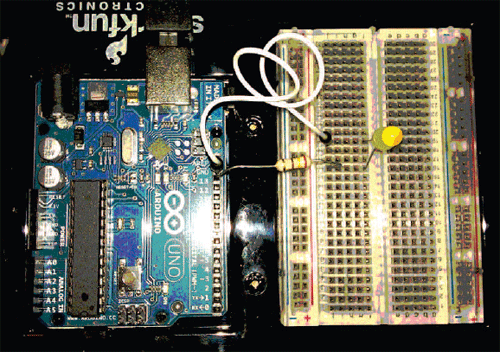
  1. Insert the LED into the breadboard
  2. Connect a wire between the ground and the short pin of the LED
  3. Connect a 330 ohm resistor between the Digital pin 13 (D13) on the Arduino and the long- leg of the LED
  4. Connect the Arduino unit to your computer with the USB cable
  5. Open the Project1 sketch into the Arduino software and upload it to your module

Things to try:

  • Code: Change the blink rate from 1 second to 3 seconds
  • Code: Change the blink rate to "strobe" at 50 times per second.
  • Can you change it to blink at 60 times per second?
  • LED: What happens if you reverse the LED (resistor & short-leg to D13, long-leg to GND)?
  • LED: What happens if you reverse the LED but connect the long-leg to +5V?
  • Code & LED - Change the sketch to use an LED connected to D7 instead of D13

Technical Support Community

Free technical support is available for your desktops, laptops, printers, software usage and more, via our new community forum, where our tech support staff, or the Micro Center Community will be happy to answer your questions online.

Forums

Ask questions and get answers from our technical support team or our community.
PC Builds
Help in Choosing Parts
Troubleshooting

Knowledge Base

Helpful articles written by Micro Center Experts.
ESET
Windows

Sign in for the best experience

Access helpful features and personalize your experience - Sign in or create an account now

Sign In
Don't have an account? Create Account