
How to change the Default Line Spacing in Word 2013
Description: This technical article will show how to change the default line spacing in Word 2013.
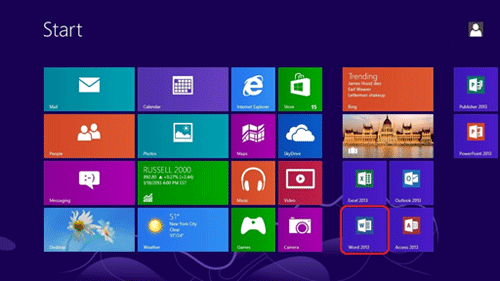
- On the Start page click on the icon for Word 2013.
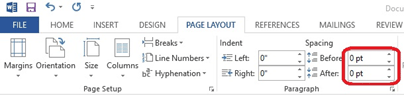
- Click on the Page Layout tab.

- Click on the small arrow in the lower left corner for Spacing.

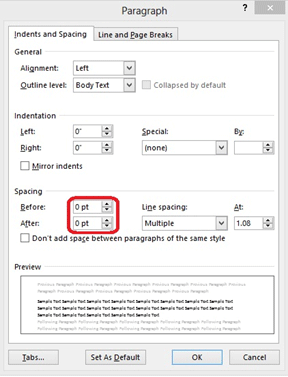
- This will open up the Paragraph menu. Change the Before and After settings to zero.
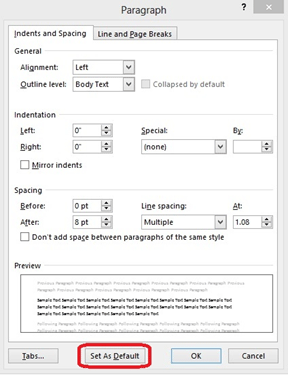
- Click on Set as Default.
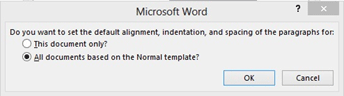
- A confirmation window will appear. Click on the selection for All documents based on this Normal template. Click on OK.
- The setting for Spacing for Before and After are now set to zero.
- The line spacing on the document is now as close as it can be for Office 2013.
Technical Support Community
Free technical support is available for your desktops, laptops, printers, software usage and more, via our new community forum, where our tech support staff, or the Micro Center Community will be happy to answer your questions online.
Forums
Ask questions and get answers from our technical support team or our community.
PC Builds
Help in Choosing Parts
Troubleshooting