
How to change the Network Name on the Tenda N60 router
Description: This technical article will show how to configure the Tenda N60 router to use a different network name, or SSID, than the default.
- First, we need to access the router's configuration page. This can be done by opening an internet browser. Next, enter 192.168.0.1 into the address bar at the top.
- Log in to the router. The default login is admin as both the username and password.
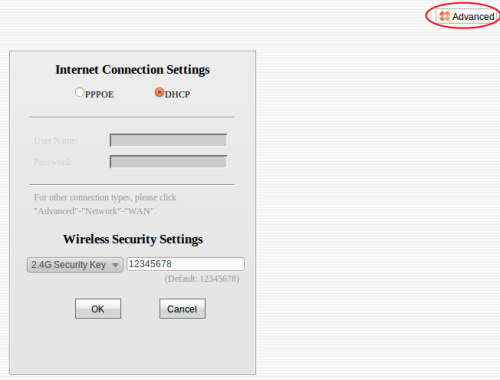
- Once logged in, the main screen shown below will appear. Click on Advanced in the upper-right.
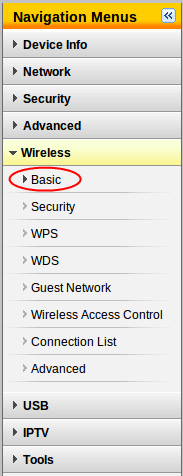
- Next, click on Wireless in the menu, and then click on Basic.
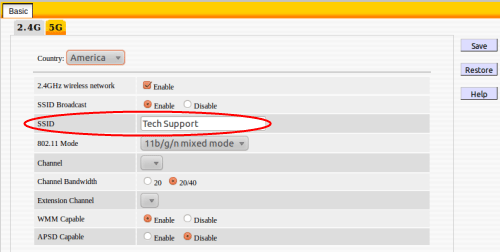
- Look for the field labeled SSID. This is the name of the network. Set it to whatever the network name should be. In this example, we are using the name Tech Support.
- With the new network name entered, click on the Save button in the upper-right. Any device that is currently connected to the network will be disconnected and will need to be reconfigured with the new SSID.
- This same process can be completed with the 5 GHz network by repeating the steps, but between steps 4 and 5, click on the 5G tab at the top.
Technical Support Community
Free technical support is available for your desktops, laptops, printers, software usage and more, via our new community forum, where our tech support staff, or the Micro Center Community will be happy to answer your questions online.
Forums
Ask questions and get answers from our technical support team or our community.
PC Builds
Help in Choosing Parts
Troubleshooting