
How to change or disable Sleep Settings in Windows 10
Description: This article will show how to change or disable sleep settings for Windows 10 computers.
- Open the Power Options by pressing and holding the Windows Key and the X Key at the same time. This will bring up a menu in the lower left corner of the screen. This can also be accessed by right clicking on the start button in the lower left corner. Select Power Options from this quick access list.

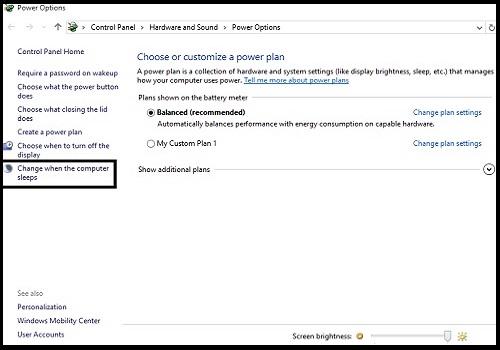
- A Power Options menu will appear. On the left side, there will be a few options. Select Change when the computer sleeps.
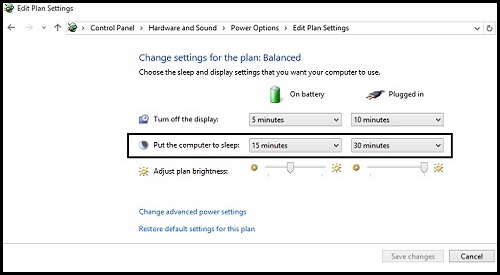
- The next screen will be to change plan settings. The option for put the computer to sleep is seen here, with two options, On battery and when Plugged in.
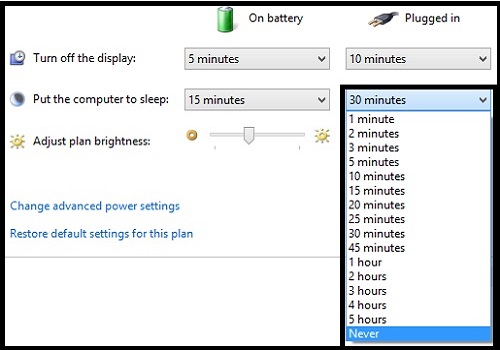
- Each setting can be adjusted accordingly by clicking on the arrow to bring down a drop down menu. Here will be options to change the time lengths. Select the time desired from the list. The new choice will be seen once selected. Once settings are changed, click Save changes.
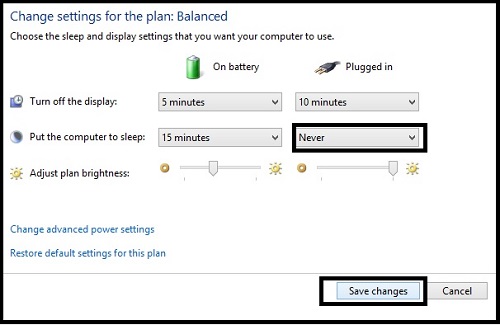
- Once save changes is selected, the edit plan settings page will close and it will return to the Power Options screen. These changes will now be in effect.
Technical Support Community
Free technical support is available for your desktops, laptops, printers, software usage and more, via our new community forum, where our tech support staff, or the Micro Center Community will be happy to answer your questions online.
Forums
Ask questions and get answers from our technical support team or our community.
PC Builds
Help in Choosing Parts
Troubleshooting