
How to change the Lock Screen Image in Windows 10
Description: Personalization features are a strong focus in Windows 10 that allow for a much more pleasurable user experience; the lock screen being one of these features. This article depicts the steps necessary to customize the lock screen picture to the user’s taste.
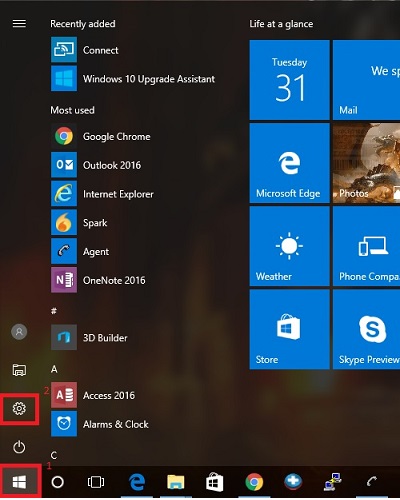
- Select the Start Button and then choose Settings.
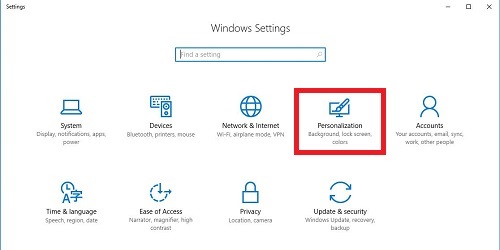
- Select Personalization.
- Select Lock Screen on the left side.
- Select the drop down menu and choose the desired background setting.
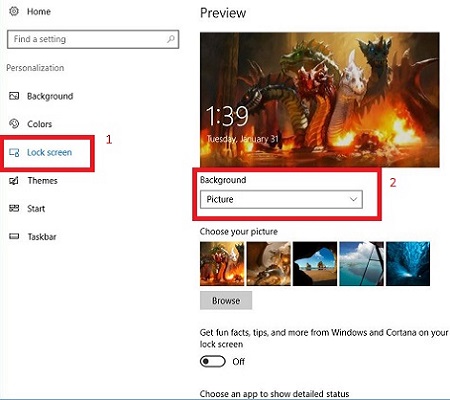
- There are three different types of background settings for the lock screen:
- Windows Spotlight - A new picture shown every 24 hours taken directly from Bing.
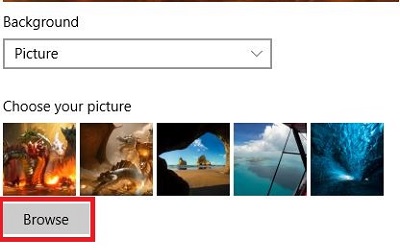
- Picture – This will show a still picture, which can be changed by using the Browse button and selecting a specific picture.
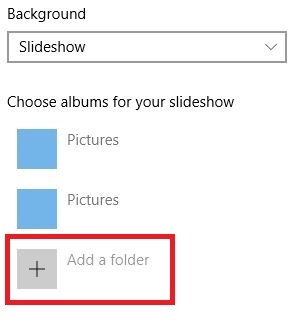
- Slideshow - A slideshow of pictures through a folder(s); you can add a folder by selecting Add a folder and remove one by highlighting the folder and then selecting Remove.
- Once the background setting has been chosen and the desired folder(s) or picture has been selected, the settings window can now be closed and the lock screen personalization is complete.
Technical Support Community
Free technical support is available for your desktops, laptops, printers, software usage and more, via our new community forum, where our tech support staff, or the Micro Center Community will be happy to answer your questions online.
Forums
Ask questions and get answers from our technical support team or our community.
PC Builds
Help in Choosing Parts
Troubleshooting