
Liquid Cooling - Process and Terms
Understanding key components of your liquid cooling system.
Liquid cooling, also referred to as water cooling
Technically liquid cooling is a more accurate description because there are various liquid coolants that can be used in different setups, but this category is also referred to as water cooling because water is, or is in some form, one of the most common liquid coolants used in the process.
How does liquid cooling work?
Thermodynamic principles indicate that heat naturally transfers from a warmer place to a cooler place, and this is the principle that liquid cooling is built upon. As your CPU, graphics card, or system board generates heat, the heat is transferred by a water block (or similarly named device) which in turn uses circulating liquid to transfer the heat away from the component. Eventually the heat passes through tubing, pipes, and a radiator with a fan that are a part of the system. In turn, these items dissipate the heat away from the source in an efficient and usually quiet manner.
Benefits of liquid cooling
- Liquid cooling can be more efficient and more effective at dissipating heat than traditional air cooling methods
- Liquid cooling can be more quiet while performing this process compared to air-only configurations
- Liquid cooling can project a cool enthusiastic image of your computer system or skills
Three ways to implement liquid cooling into your PC
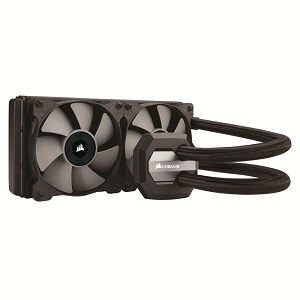
- All-In-One single products – this can be a self-contained single-product enclosed system. There is little to no assembly required and there are no choices to make other than which product to buy. You simply buy the product and install it per the instructions in the package.
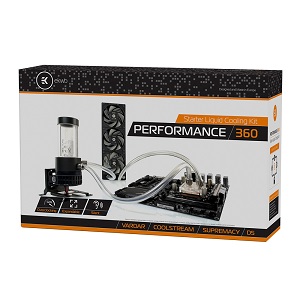
- Pre-configured kits – with this option you build and assemble your own cooling system, but most or all parts that are required are already included in the package as a DIY kit. You don’t need to worry about how many of which size or kind of parts to buy because that is all taken care of for you and presented in a pre-packaged kit. Simply assemble and install and test per the instructions and your Liquid cooling system is ready to go.
- Custom design and build – when taking this approach, it is important to have an informed understanding of what parts are necessary and how they are going to work together. Methodical attention to detail and determined patience is absolutely required to achieve a successful outcome. This approach is not for everyone, but enthusiasts really enjoy the challenges and successes of designing and building their own Liquid cooling system.
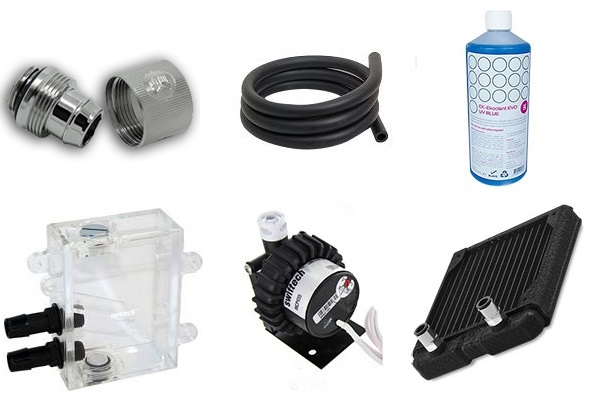
Common Terms and Definitions
- Additive - added to coolant to prevent undesired growth of bacteria
- Coolant - liquid that fills and flows through the system to transfer heat - may be distilled or treated water or other specialized fluid
- Fan - attaches to the radiator to help dissipate heat
- Fitting - connects tubing and components to form a closed system
- Pump - circulates coolant through the closed system
- Radiator - main heat transferring part, in conjunction with fans, dissipates the heat
- Reservoir - used for filling and holding coolant
- Tubing - links individual parts to form a closed system
- Water Block or Block - touches or attaches to a heat generating part for transferring heat away from that part
Routine Maintenance and Housekeeping
Custom liquid cooling is not just about choosing the right parts, but also about preparing those parts for installation. Just like washing fruit before you eat it, make sure you clean out your parts before installing them in your system. Rinse out your components and tubing with clean or distilled water and make sure there is no debris inside the water blocks, then make sure everything is completely dry before installation.
Long term care is also required for custom liquid cooling. The liquid will get dirty over time, tubing can get stained, things could wear out and leaks could come up. You should perform routine maintenance every 6 to 12 months. Drain the loop and replace it with fresh coolant, inspect tubing for any damage and replace it if necessary, and clean out your water blocks. You should occasionally be checking for leaks as well, as some leaks can be very slow and you may not see any leakage for hours or even days at a time.
Leak Testing
Once your loop is assembled, you will need to test it for leaks before you actually turn your PC on. If you turn on the system and there are leaks in your loop, there is a good chance a component will get wet and be damaged. There are two different methods you can use to test for leaks on your loop: using air pressure and using coolant.
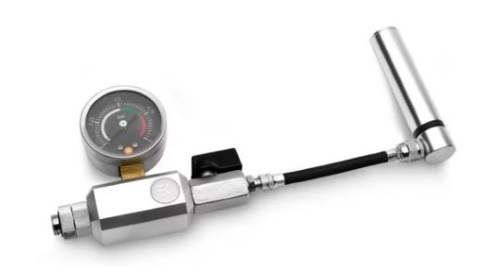
The air pressure method utilizes an air pump to pressurize the loop, and an air pressure gauge to measure the pressure on the system. You pressurize the loop up to 0.5-0.75 bar, then leave it for at least 15 minutes and then check if the pressure goes down. The idea is that if the system is airtight and leak free it will maintain pressure over time. If the pressure does go down, then there is a leak somewhere in the system. The downside to this method is it does not tell you exactly where a leak is unless you isolate specific parts of the loop and test them individually. There are tools such as the EK Leak Tester pictured below which are specifically made for air testing your loop.
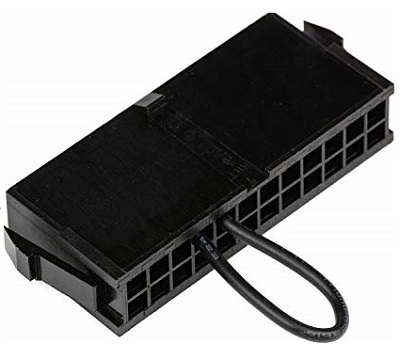
The coolant method has you run just the pump to circulate liquid through the system while the rest of the components are disconnected. Make sure your CPU, GPU and motherboard power cables are unplugged to avoid any possible risk of shorting them out and that you have liquid in your reservoir so that you do not run the pump dry. If you run the pump dry, it can fail VERY quickly. Place paper towels or cloths around the loop in strategic locations: near or under any fittings and connections, under the pump, under the reservoir, on top of your GPU, around the CPU/GPU water blocks, etc. Once you do so, you will need to connect the pump and jump the PSU to power it on. First, unplug the power supply and flip the switch on the back to O. You will need to use either a power supply jumper that plugs into the 24-pin motherboard power cord:
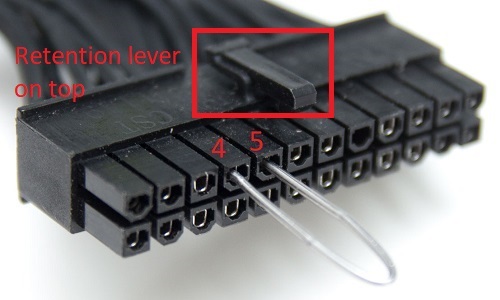
or use a paper clip that is inserted into pins 4 and 5 on the 24-pin motherboard power cable. To determine the correct pins, have the retention lever on the power cord on the top, then count the number pins from the left to right in the top row:
This article is part of a multi part series.
Liquid Cooling - Tubing and Fittings can be found here.
Liquid Cooling - Water Blocks Radiators and Fans can be found here.
Liquid Cooling - Coolants Reservoirs and Pumps can be found here.
Technical Support Community
Free technical support is available for your desktops, laptops, printers, software usage and more, via our new community forum, where our tech support staff, or the Micro Center Community will be happy to answer your questions online.
Forums
Ask questions and get answers from our technical support team or our community.
PC Builds
Help in Choosing Parts
Troubleshooting